Chapter 1 HTML
Last updated: 2020-06-24 13:45:22
1.1 Introduction
In this chapter, we introduce the most basic and fundamental component of web technologies: HTML. As we will see, HTML is a data format used to encode the contents and structure of web pages. HTML is usually stored in plain text files with the .html file extension. Every time one accesses a web page, using a web browser, the respective HTML file for that web page is transferred and decoded into the visual image that we see on screen. Simple web pages, such as the ones we build in this chapter, are composed of nothing but HTML code contained in a single .html file.
Starting from this chapter and onward, we are going to present computer code examples. Some examples are short, separate pieces of code used to illustrate an idea or concept. Other examples include the complete source code of a web page, which you can open and display in the browser, as well as modify and experiment with. The way that each of the complete code examples will appear when opened with the browser is shown in a separate figure, such as in Figure 1.1. As mentioned in Section 0.7, the online version of this book contains live versions of all ninety-plus complete examples (Appendices B–C), as well as a downloadable folder with all code files to experiment with the examples on your own computer (Appendix A).
Learning programming requires a lot of practice, so it is highly recommended to open the examples on your computer as you go along through the book. Better yet, you can modify the code of each example and observe the way that the displayed result changes, to make sure you understand what is the purpose of each code component. For instance, the first example (Figure 1.1) displays a simple web page with one heading and one paragraph—you can try to modify its source code (see Section 1.4 to learn how) to change the contents of the heading and/or paragraph, to add a second paragraph below the first one, and so on.
Chapter 2 in Introduction to Data Technologies (Murrell 2009) gives a gentle and gradual introduction to HTML as well as the practice of writing computer code3. It is a highly recommended complementary reading to the present chapter, especially for readers who are new to computer programming.
1.2 How do people access the web?
1.2.1 Web browsers
People access the web using software known as a web browser. Popular examples of web browsers are listed in Table 1.1.
| Browser | URL |
|---|---|
| Chrome | https://www.google.com/chrome/ |
| Firefox | https://www.mozilla.org/en-US/firefox/ |
| Edge | https://www.microsoft.com/en-us/windows/microsoft-edge |
| Internet Explorer | https://www.microsoft.com/en-us/download/internet-explorer.aspx |
| Safari | https://www.apple.com/lae/safari/ |
In order to view a web page, users might:
- Type a URL (Section 5.5.1) into the address bar of the browser
- Follow a link from another site
- Use a bookmark
1.2.2 Web servers
When you ask your browser for a web page, typing a URL such as https://www.google.com in the address bar, the request is sent across the internet to a special computer known as a web server which hosts the website. Web servers are special computers that are constantly connected to the internet, and are optimized to send web pages out to people who request them. Your computer, the client, receives the file and renders the web page you ultimately see on screen. We will discuss web servers and server-client communication in Chapter 5.
When you are looking at a website, it is most likely that your browser will be receiving HTML and CSS documents from the web server that hosts the site. The web browser interprets the HTML and CSS code to create the page that you see. We will learn about HTML in Chapter 1 (this chapter) and about CSS in Chapter 2.
Most web pages also send JavaScript code to your browser to make the page interactive. The browser runs the JavaScript code, on page load and/or later on while the user interacts with the web page. The JavaScript code can modify the content of the page. We will introduce JavaScript in Chapters 3–4.
1.3 Web pages
At the most basic level, a web page is a plain text document containing HTML code. This book comes with several examples of complete web pages. The examples are listed in Appendices B–C. They can be viewed and/or downloaded from the online version of this book (Section 0.7).
The first example, example-01-01.html, is a minimal HTML document. When opening this file in the browser, a minimal web page is displayed (Figure 1.1).
FIGURE 1.1: example-01-01.html (Click to view this example on its own)
Here is the source code you should see when opening the file example-01-01.html in a plain text editor (Figure 1.2), or in the source code tab in the browser (Figure 1.3):
<!DOCTYPE html>
<html>
    <head>
        <title>A minimal web page</title>
    </head>
    <body>
        <h1>This is the main heading</h1>
        <p>This is a paragraph.</p>
    </body>
</html>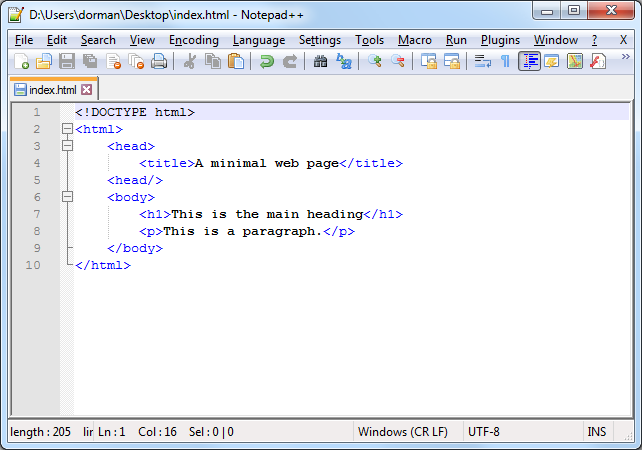
FIGURE 1.2: HTML document source code viewed in a text editor (Notepad++)
- Download the book materials from the online version (Section 0.7).
- Open the first example, a file named
example-01-01.html, in a web browser such as Chrome, by double-clicking on the file, or by clicking with the right mouse button and selecting Open with… then choosing a web browser program4. The fileexample-01-01.htmlis a minimal HTML document, as shown on the left pane of Figure 1.3.- Press Ctrl+U (in Chrome) to open a new tab with the source code that was used to create the page, as shown on the right pane of Figure 1.3.
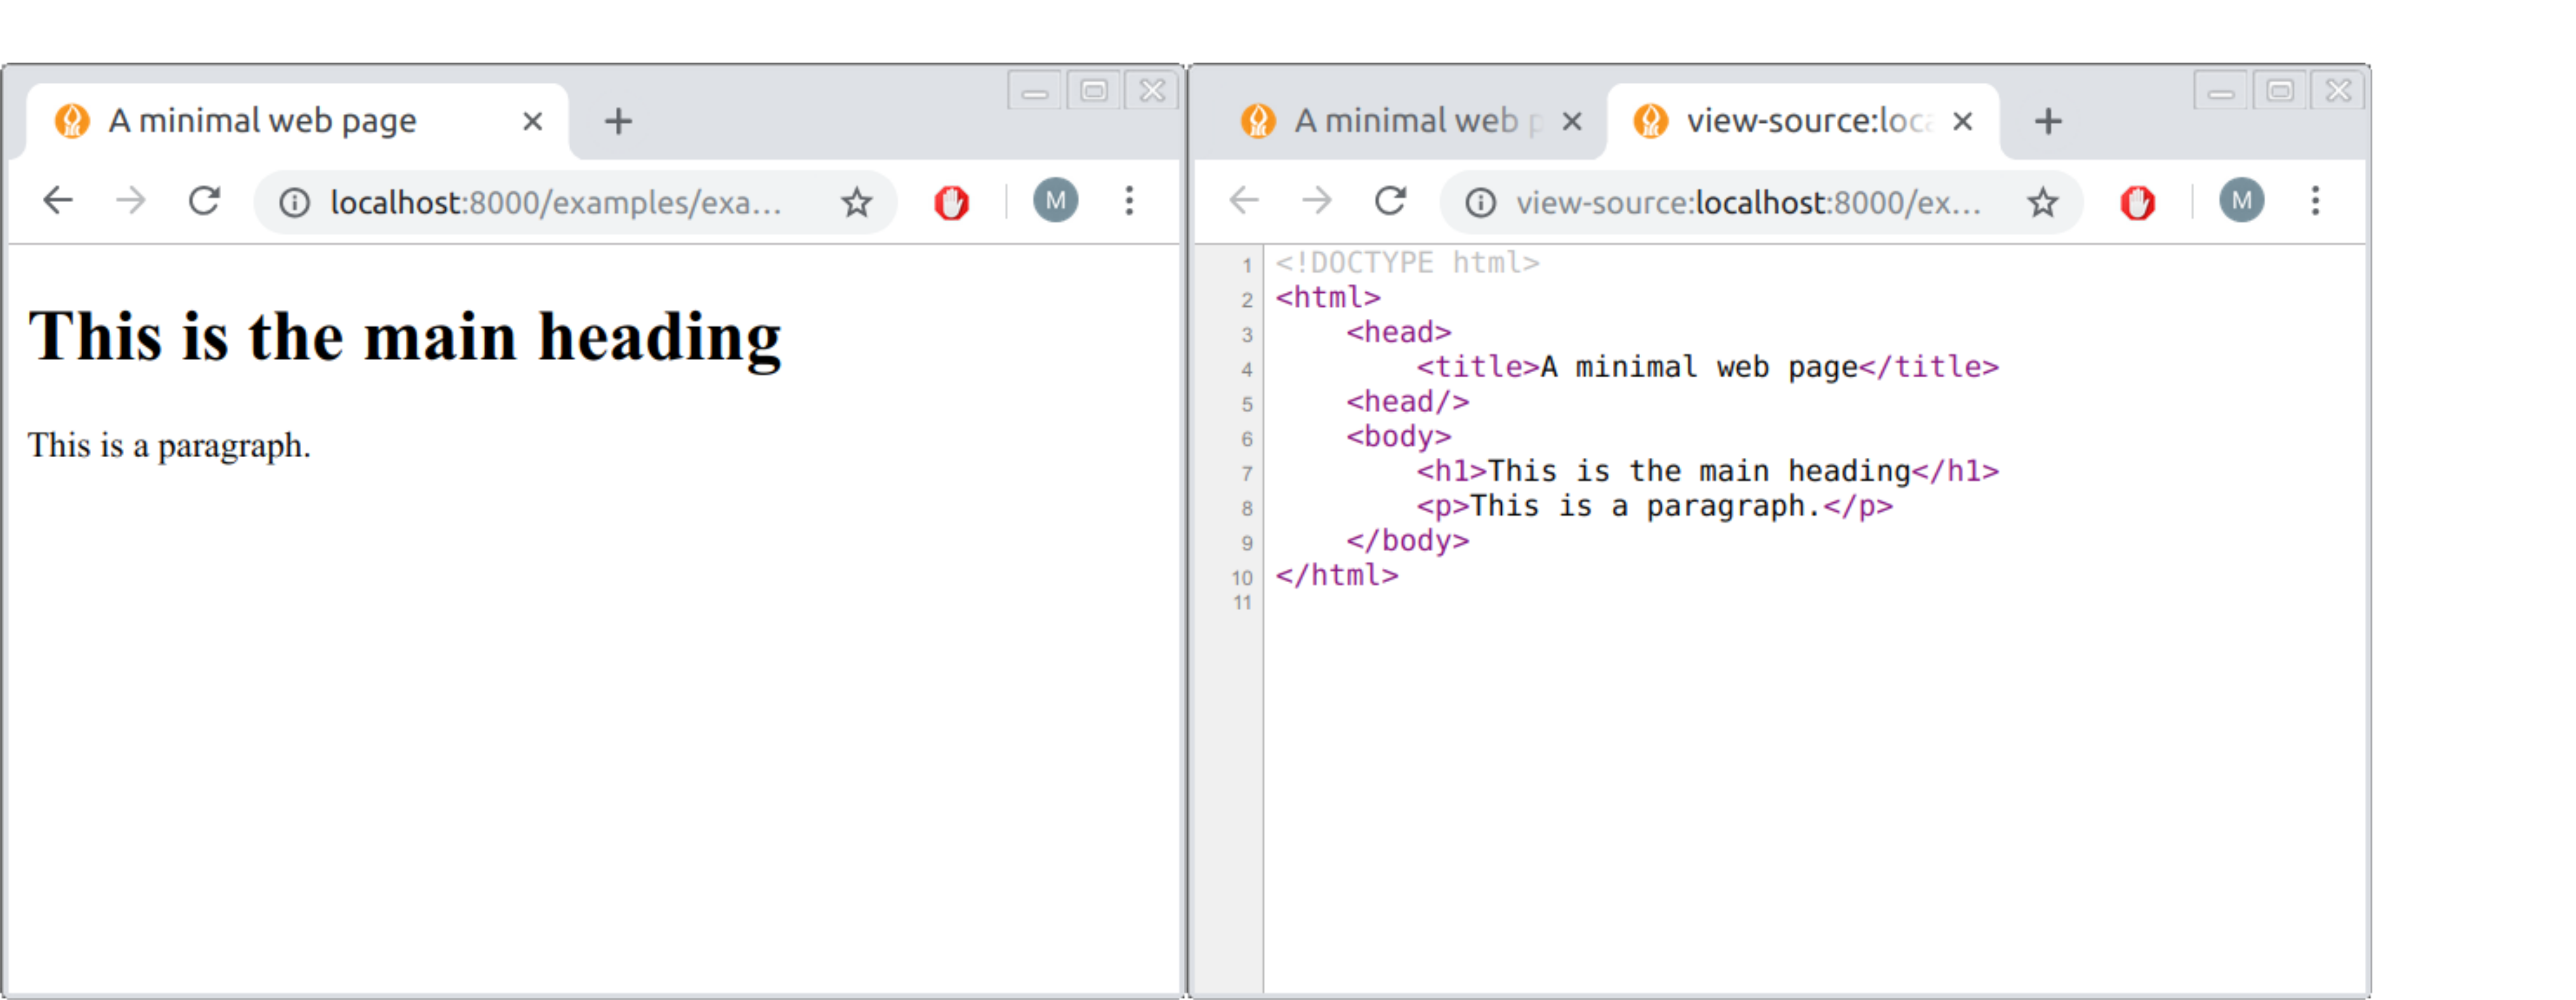
FIGURE 1.3: HTML document (left) and its source code (right)
The source code comprises the contents of an HTML document. The source code is sent to the browser, then processed to produce the display shown in Figure 1.1.
The example-01-01.html file contains a minimal web page, built using a single (short) HTML document. As we shall see throughout the book, more complicated web pages also include CSS and/or JavaScript code, possibly in separate files linked to the main document. Each of these three languages has a different role when building the web page you see in the browser:
- HTML (
.html)—Determines page contents - CSS (
.css)—Determines presentation style - JavaScript (
.js)—Determines interactive behavior
1.4 Text editors
HTML, CSS, and JavaScript code, like any other computer code, is plain text stored in text files. To edit them, you need to use a plain text editor. The simplest option is Notepad++. There are also more advanced editors such as Sublime Text. The more advanced editors contain additional features for easier text editing, such as shortcuts, highlighted syntax, marked matching brackets, etc. You can use any plain text editor you prefer5.
- Open a plain text editor, such as Notepad++.
- Copy the HTML code section given above (Section 1.3) and paste it into a blank text document (Figure 1.2).
- Click Save As… and save the document to a file named
index.html. If you are using Notepad++, make sure you choose Save as type… and select the Hyper Text Markup Language (HTML) file format.- Go to the location where you saved the file on your computer and double click on the file.
- The browser should now open and display the minimal web page!
- Go back to the text editor, locate the text
This is a paragraph., replace it with any other text of your choice and save the document.- Refresh the browser—you should see the new text displayed on the web page!
1.5 What is HTML?
1.5.1 Overview
Hypertext Markup Language (HTML) is the language that describes the contents and structure of web pages. Most web pages today are composed of more than just HTML, but simple web pages—such as example-01-01.html and the other examples we create in this chapter—can be made with HTML alone.
HTML code consists of HTML elements. An HTML element contains text and/or other elements. This makes HTML code hierarchical. An HTML element consists of a start tag, followed by the element content, followed by an end tag. A start tag is of the form <elementName> and an end tag is of the form </elementName>. The start and end tags contain the element name (elementName).
The following example shows a <title> element; the start tag is <title>, the end tag is </title>, and the contents is the text Web Mapping:
Table 1.2 summarizes the basic components of an HTML element.
| Component | Example |
|---|---|
| HTML element |
<title>Web Mapping</title>
|
| Start tag |
<title> Web Mapping</title>
|
| Element name |
< title >Web Mapping</title>
|
| Element contents |
<title> Web Mapping </title>
|
| End tag |
<title>Web Mapping </title>
|
Some HTML elements are empty, which means that they consist of only a start tag, with no contents and no end tag. The following code shows an <hr> element, which is an example of an empty element:
An element may have one or more attributes. Attributes appear inside the start tag and are of the form attributeName="attributeValue". The following code section shows an example of an <img> element, with an attribute called src. The value of the attribute in this example is "images/leaflet.png". Note that <img>, like <hr>, is an empty HTML element, which is why it does not have an end tag.
Table 1.3 summarizes the components of an HTML element with an attribute.
| Component | Example |
|---|---|
| HTML element |
<img src=“images/leaflet.png”>
|
| Element name |
< imgsrc=“images/leaflet.png”>
|
| Attribute |
<img src=“images/leaflet.png” >
|
| Attribute name |
<imgsrc =“images/leaflet.png”>
|
| Attribute value |
<img src= “images/leaflet.png” >
|
There can be more than one attribute for an element, in which case they are separated by spaces. For example, the following <img> element has two attributes, src and width:
It is important to note that there is a fixed set of valid HTML elements (see below), and each element has its own set of possible attributes. Moreover, some attributes are required while others are optional. For example, the src attribute is required for the <img> element, but irrelevant for the <title> element. As we will see shortly, there are also rules regarding the elements that another element can contain. (Don’t worry about the meaning of the element and attribute names we mentioned just yet, we will cover this shortly in Section 1.6.)
As for the entire document structure, an HTML document must include a DOCTYPE declaration and a single <html> element. Within the <html> element, there must be a single <head> element and a single <body> element. Within the <head> element there must be a <title> element. This leads us to the minimal HTML code shown below:
Technically, everything except for the DOCTYPE declaration is optional since in most cases the browser can automatically fill the missing parts. For clarity, most websites nevertheless include the above minimal structure, and so will we.
As mentioned above, the primary role of HTML code is to specify the contents of a web page. The type of elements being used and their ordering determine the structure of information that is being displayed in the browser.
1.5.2 HTML comments
It is good practice to keep comments in our code, so that we can remember our intentions later on, and so that other people reading our code can understand what we did more easily. In HTML, comments are written as follows:
Anything between the start <!-- and end -->, including HTML tags, is completely ignored by the computer. It is only there to pass messages to a human reader of the code.
1.5.3 Block vs. inline
While learning about the various HTML elements, it is important to keep in mind that HTML elements are divided into two general types of behaviors:
- Block-level elements
- Inline elements
A block-level element, or simply a block element, is like a paragraph. Block elements always start on a new line in the browser window (Figure 1.4). Examples of block elements include:
- Headings (
<h1>) - Paragraphs (
<p>) - Bullet-point lists (
<ul>) - Numbered lists (
<li>)
It is helpful to imagine block elements as horizontal boxes. Box width is determined by the width of the browser window, so that the box fills the entire available space. Box height is determined by the amount of content. For example, a paragraph fills the entire available page width, with variable height depending on the amount of text. (This is the default behavior; in Chapter 2 we will see that the height and width can be modified using CSS.)
An inline element is like a word within a paragraph. It is a small component that is arranged with other components inside a container. Inline elements appear on the same line as their neighboring elements (Figure 1.4). Examples of inline elements include:
- Links (
<a>) - Bold text (
<b>) - Italic text (
<i>) - Images (
<img>)
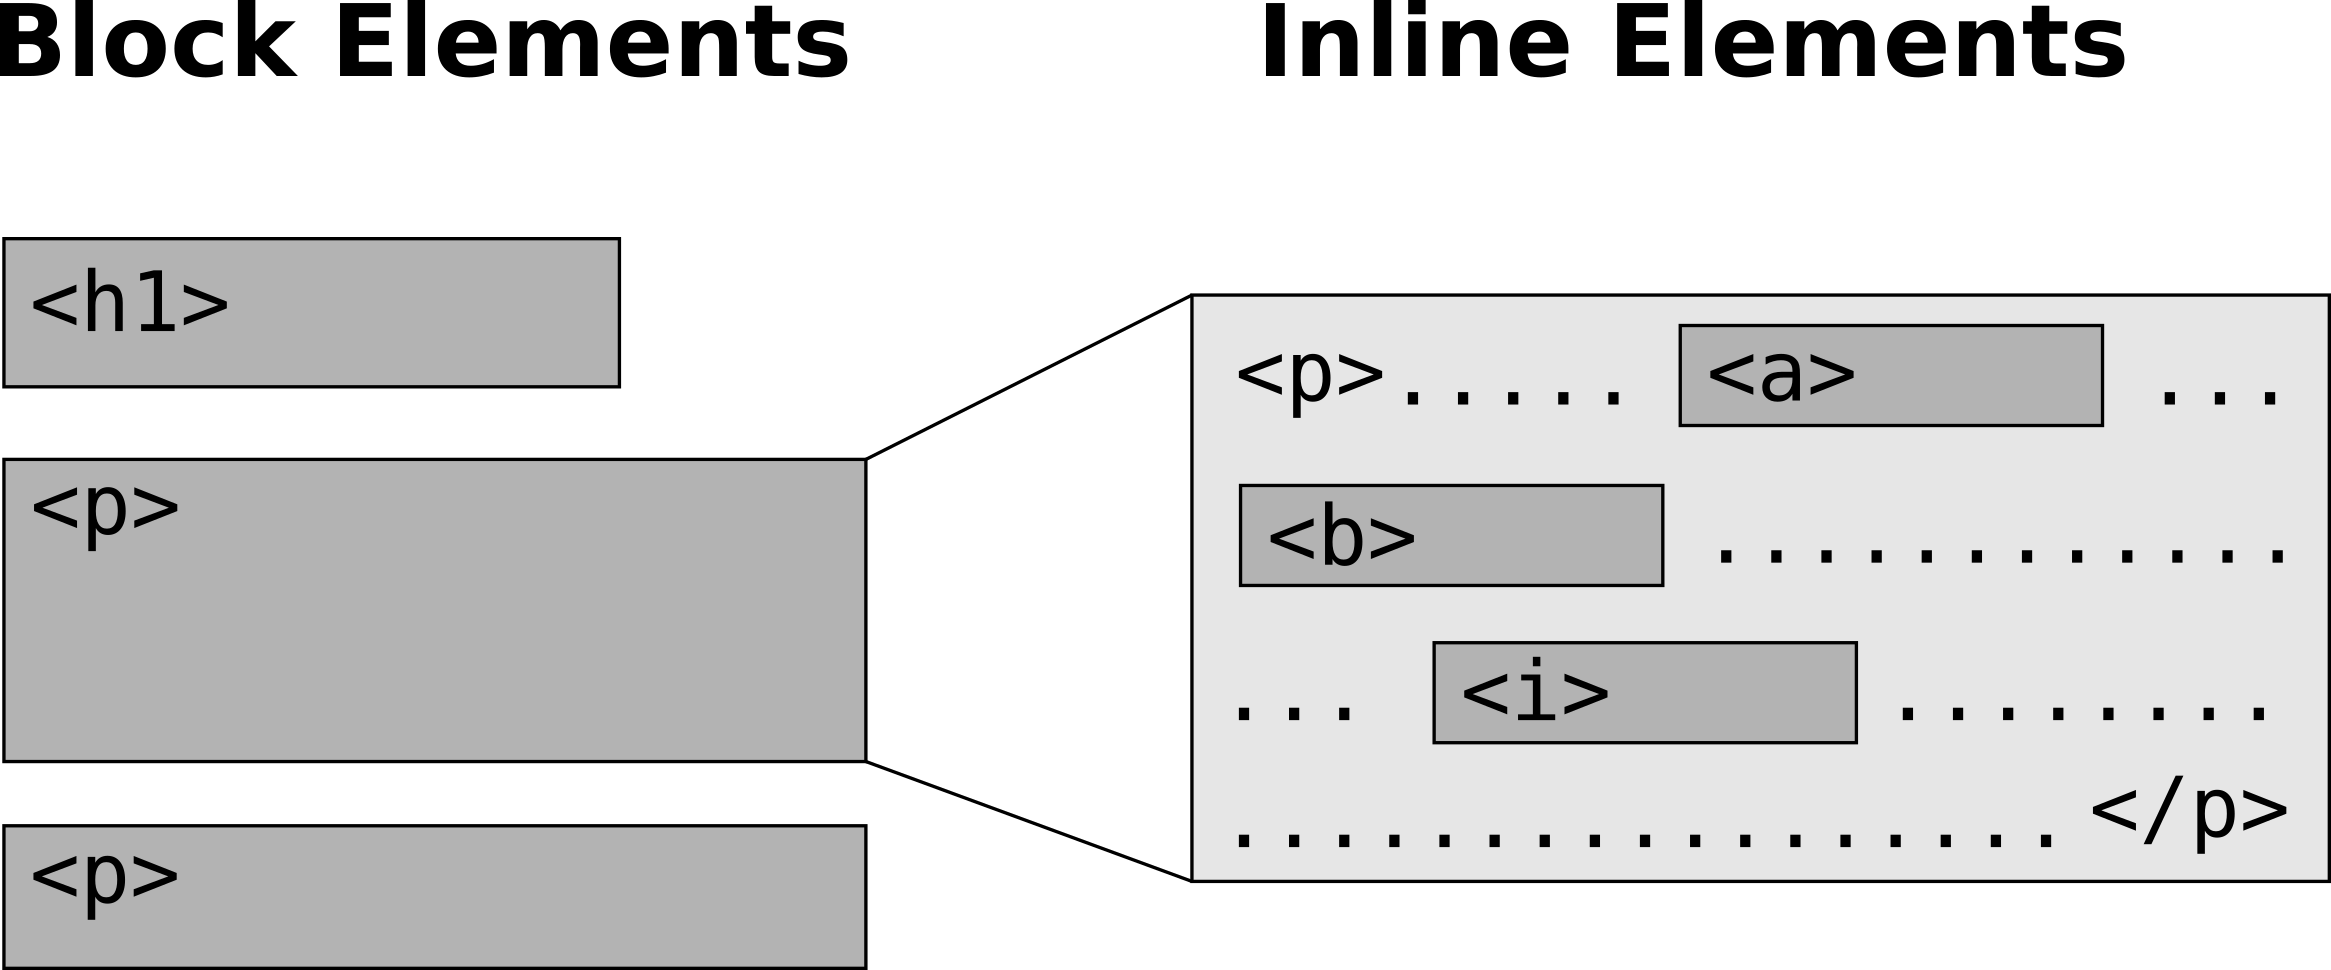
FIGURE 1.4: Block vs. inline HTML elements
1.6 Common HTML elements
1.6.1 HTML element types
This section briefly describes the important behavior, attributes, and rules for each of the common HTML elements. We will use most of these elements throughout the book, so it is important to be familiar with them from the start. You don’t need to remember how to use each element—you can always come back to this section later on. Keep in mind that the HTML elements we are going to cover in this chapter are just the most common ones. HTML defines a lot of other element types that we will not use in the book6.
For convenience, the HTML elements we will cover will be divided into three types according to their role (Table 1.4) in determining page contents and structure. Other than elements setting the basic document structure, there are elements giving general information about the page (mainly inside the <head> element) and elements giving the actual content shown on screen (inside the <body> element). In the following Sections 1.6.2–1.6.13, we are going to cover the listed elements in the same order as given in Table 1.4.
| Role | Element | Description |
|---|---|---|
| Document structure | <!DOCTYPE> |
Document type declaration |
<html> |
Document | |
<head> |
General information | |
<body> |
Content | |
| General information | <title> |
Title |
<meta> |
Metadata | |
<style> |
Embedded CSS code | |
<link> |
External CSS code | |
<script> |
JavaScript code | |
| Content | <h1>, <h2>, …, <h6> |
Headings |
<p> |
Paragraphs | |
<b>, <i>, <sup>, <sub>, <pre> |
Font types | |
<br>, <hr> |
Spacing | |
<ul>, <ol>, <li> |
Lists | |
<a> |
Links | |
<img> |
Images | |
<table>, <th>, <tr>, <td> |
Tables | |
<div>, <span> |
Grouping | |
<input>, <select>, <option> |
User input |
1.6.2 Structure
1.6.2.1 Overview
The <!DOCTYPE> declaration specifies the version of HTML that the document is written in. It is followed by the <html>, <body>, and <head> elements, which determine the top-level division of the HTML document into two components: general information about the page (inside the <head>) and the actual content (inside the <body>).
1.6.2.2 <!DOCTYPE>
The <!DOCTYPE> declaration must be the first thing in the HTML document, before the <html> tag. The <!DOCTYPE> declaration is in fact not an HTML tag. It is an instruction to the browser, telling it what version of HTML the page is written in. In this book we will use the following declaration, which specifies we are using the HTML5 version of HTML:
1.6.2.3 <html>
The opening <html> tag indicates that anything between it and a closing </html> tag is HTML code. The <html> element must contain exactly one <head> element followed by exactly one <body> element.
1.6.2.4 <head>
The <head> element contains information about the page, rather than information that is shown within the main part of the browser window.
1.6.2.5 <body>
Everything inside the <body> element is actually displayed inside the browser window. This is where page contents are specified.
Combining the <!DOCTYPE> declaration and the three structural HTML elements, we get the following “template” of a minimal HTML page, which we have already seen above:
<!DOCTYPE html>
<html>
    <head>
        <!-- General information goes here -->
    </head>
    <body>
        <!-- Page content goes here -->
    </body>
</html>
The other elements that we will learn about appear within the <head> or within the <body> element. The <head> element commonly contains the following elements:
<title>for specifying page title<meta>elements for specifying page metadata<style>and<link>elements for loading CSS code<script>elements for loading JavaScript code
The <body> element contains mostly elements related to contents, such as paragraphs (<p>), lists (<ol>), images (<img>), and so on. In addition, the <body> can also contain <script> elements for JavaScript code, just like the <head>. Thus JavaScript code can be placed in the <body>, or in the <head> section of an HTML document, or in both. We are going to encounter both options for placing JavaScript code later on in the book (Section 6.5.4).
The following Sections 1.6.3–1.6.4 provide more details on the five elements that commonly occur in the <head> element. Then, Sections 1.6.5–1.6.13 describe elements that are found in the <body> element.
1.6.3 Title and metadata
1.6.3.1 <title>
The contents of the <title> element specify the page title. The title is either shown in the top of the browser window, above where you usually type in the URL of the page you want to visit, or on the tab for that page. The <title> element must be within the <head> element and must only contain text. For example, the <title> element in the HTML document of the online version of this chapter is:
- Open a web page of your choice in the Chrome browser.
- Press Ctrl+U to open the HTML source code (Figure 1.3).
- Try to locate the
<title>element (or use Ctrl+F to search), and compare its contents with the title shown in the browser window.
1.6.3.2 <meta>
The <meta> element contains information about the web page, or its metadata. The <meta> element is typically used to specify page description, keywords, the name of the document author, last modified date, and other general information. The metadata may be used by the browser and by search engines to optimize display and indexing of the page, respectively.
The <meta> element is an empty element. It typically uses the name and content attributes to carry the metadata, or the charset attribute to specify character encoding for the document. In the following example we see a <head> element containing several <meta> elements, specifying various metadata items:
<head>
    <meta charset="UTF-8">
    <meta name="description" content="Free Web tutorials">
    <meta name="keywords" content="HTML,CSS,XML,JavaScript">
    <meta name="author" content="John Doe">
    <meta name="viewport" content="width=device-width, initial-scale=1.0">
</head>
For example, the <meta> element with name="viewport" specifies web page display instructions, which is useful to make sure the web page is correctly scaled across different devices. We are going to use this to disable unwanted scaling of Leaflet web maps on mobile devices (Section 6.5.11).
It is also recommended to declare the character encoding used in the document. If the encoding declaration is omitted, special characters may be wrongly interpreted and displayed. For example, we may use the following <meta> element to specify that our document is encoded with UTF-8:
None of the code examples in this book contain special characters, so we will omit the encoding declaration to keep the code more simple.
1.6.4 Styling and scripts
1.6.4.1 <style>
The <style> element is used to specify embedded CSS, which we will learn about in Section 2.7.3. The contents of the <style> element is CSS code. Here is an example of a <style> element with its CSS code:
1.6.4.2 <link>
The <link> element refers to external CSS, which we will learn about in Section 2.7.4. The <link> element is an empty element that must reside inside the <head> element. Its important attributes are:
rel—Should have the value"stylesheet"href—Specifies the location of a file containing CSS code
An example of a <link> element is shown below:
1.6.4.3 <script>
The <script> element is used to load JavaScript code, which we will learn about starting in Chapter 3. The <script> element may contain JavaScript code as text contents, much like the <style> element contains embedded CSS code as text contents (Section 1.6.4.1). Here is an example of a <script> element with embedded JavaScript code:
<script>
    function hello() {
        document
            .getElementById("demo")
            .innerHTML = "Hello JavaScript!";
    };
    document
        .getElementById("change_text")
        .addEventListener("click", hello);
</script>
Alternatively, the <script> element may contain an src attribute, which specifies the location of a file containing JavaScript code. This is similar to the way that the <link> element specifies the location of an external file with CSS code (Section 1.6.4.2). Here is an example of a <script> element that links to an external file with JavaScript code:
We will elaborate on specifying file paths in <link> and <script> elements in Section 5.5.
1.6.5 Headings and paragraphs
1.6.5.1 <h1>, <h2>, <h3>, <h4>, <h5>, <h6>
The <h1>, <h2>, …, <h6> elements are block-level elements that denote that the contents are a section heading. The <h1> element is used to specify the highest, top-level headings. The <h2> element is used to specify second-level headings, and so on. For example, the following HTML element defines a second-level heading:
1.6.5.2 <p>
The <p> element is a block-level element defining a paragraph. Note that the browser automatically decides where to break lines inside the paragraph, according to the containing element width (see Section 1.6.7 below). For example, the following code defines a paragraph:
- Open the web page of the online version of this book, or any other web page that has lots of text.
- Resize browser window width.
- You should see the paragraph length changing, as the text is being split to multiple lines in different ways, depending on page width.
1.6.6 Font formatting
1.6.6.1 Overview
Some characteristics of font formatting can be modified using HTML elements, such as <b> for bold font (Section 1.6.6.2), <i> for italics (Section 1.6.6.3), <sup> for superscript (Section 1.6.6.4), <sub> for subscript (Section 1.6.6.5), and <pre> for preformatted text (Section 1.6.6.6). These characteristics, and other ones such as text color, can also be specified using CSS, which we learn later on (Sections 2.8.2–2.8.3).
1.6.6.2 <b>
Text within the <b> element appears bold. For example, the following HTML code:
renders the “is bold” part in bold font.
1.6.6.3 <i>
Text within the <i> element appears italic. For example, the following HTML code:
renders the “is italic” part in italic font.
1.6.6.4 <sup>
Text within the <sup> element appear superscript. For example, the following HTML code:
appears in the browser as:
E=MC2
1.6.6.5 <sub>
Text within the <sub> element appear subscript. For example, the following HTML code:
appears in the browser as:
The concentration of CO2 is increasing.
1.6.6.6 <pre>
The <pre> element—preformatted text—is a block-level element that displays any text contents exactly as it appears in the source code. This is contrary to the usual behavior, where the browser ignores line breaks and repeated spaces (Section 1.6.7). The <pre> element is useful for displaying computer code or computer output. For example, consider the following <pre> element:
<pre>
Text in a pre element
is displayed in a fixed-width
font, and it preserves
both      spaces and
line breaks
</pre>
The text is displayed in the browser as is, with the given spaces and line breaks:
Text in a pre element
is displayed in a fixed-width
font, and it preserves
both      spaces and
line breaks
Note that the <pre> element contents are displayed in a fixed-width font by default, which is convenient for computer code but may not be suitable for ordinary text.
- Try pasting the above text inside a
<p>element, rather than a<pre>element, to observe the way that line breaks and multiple spaces are ignored when the text is displayed in the browser.
1.6.7 Spacing
1.6.7.1 Whitespace collapsing
When the browser comes across two or more spaces next to each other, it only displays one space. Similarly, if it comes across a line break, it treats it as a single space too. This is known as whitespace collapsing. Consider the following HTML code of example-01-02.html:
<!DOCTYPE html>
<html>
    <head>
        <title>White space collapsing</title>
    </head>
    <body>
        <p>The Moon's distance to Earth is 384,402 km</p>
        <p>The Moon's      distance to Earth is 384,402 km</p>
        <p>The Moon's distance to Earth

        is 384,402 km</p>
    </body>
</html>
All three paragraphs appear the same in a web browser (Figure 1.5) because multiple spaces and new line breaks are ignored.
FIGURE 1.5: example-01-02.html (Click to view this example on its own)
What if we still need to break our text, outside of a <pre> element? The <br> and <hr> elements can be used to do that, as shown in the next two Sections 1.6.7.2–1.6.7.3.
1.6.7.2 <br>
The <br> element is an empty element that forces a new line or line break. For example, the following <br> element will split the sentence in two lines:
The first line will contain the “This is a new” part, while the second line will contain the “line” part. The <br> element should be used sparingly; in most cases, text should be broken into lines by the browser to fit the available space.
1.6.7.3 <hr>
The <hr> element is an empty element that produces a horizontal rule (line). For example:
A horizontal line will appear in the browser at the location where the <hr> element appears.
1.6.8 Lists
1.6.8.1 <ul>, <ol>, and <li>
An unordered list (i.e., a bullet-point list) can be created with the <ul> element. The <ul> element contains internal <li> elements, representing the individual list items. For example, the following HTML code creates an unordered list with three items:
An ordered list (numbered list) list can be created exactly the same way, just replacing the <ul> element with the <ol> element. For example, the following HTML code creates an ordered list with the same three items:
Figure 1.6 shows example-01-03.html, a web page with two headings and the two lists shown in last two code sections.
FIGURE 1.6: example-01-03.html (Click to view this example on its own)
It is important to note that list items (<li> elements) can contain anything, not just text. For example, you can make a list of tables, a list of images, a list of lists, and so on. Lists can also be styled (using CSS) in different ways, to serve different purposes. Navigation bars and tables of contents you usually see on web pages are commonly just styled lists. For example, the sidebar with the table of contents in the online version of this book (Section 0.7) is actually a set of nested lists.
1.6.9 Links
1.6.9.1 <a>
The <a> element creates a link. Links are the defining feature of the web, because they allow you to move from one page to another—enabling the very idea of browsing or surfing. There are several types of links:
- Links from one website to another website
- Links from one page to another page on the same website
- Links from one part of a web page to another part of the same page
- Other types of links, such as those that start up your email program and compose a new email to someone
Additionally, we can distinguish between links that open in the same browser window and links that open in a new browser window.
Users can click on anything between the opening <a> tag and the closing </a> tag of a link. This means a link can be composed of text, but also other clickable elements such as images. The address of the page that the link leads to is specified using the href (Hypertext reference) attribute. The value of an href attribute can be:
- An absolute URL which points to another website, such as
href="http://www.bgu.ac.il". - A relative URL which points to a file within a website. For example,
href="index.html"points to the file namedindex.htmlon the currently viewed website (more on URLs and website file structure in Section 5.5). - A link to an element with a specified
id(see Section 1.7.2 below) within the current web page, in which case the browser will scroll to that location. For example,href="#top"points to the element that hasidvalue of"top". - A combination of a URL and location within the page. For example,
href="index.html#top"points to the element that hasidvalue of"top"within the file namedindex.html.
By default, the link is opened in the same browser window. If you want a link to open in a new window, you can add the target="_blank" attribute in the opening <a> tag.
For example, the following HTML code displays the word “BGU” as a link—usually in blue and underlined font. Clicking on the word “BGU” navigates to http://www.bgu.ac.il in a new browser window.
- Edit the HTML file of either one of the examples shown so far (
example-01.html,example-02.htmlorexample-03.html) by inserting the above<a>element into the HTML<body>.- Refresh the page.
- You should now see a functional link to the http://www.bgu.ac.il page.
1.6.10 Images
1.6.10.1 <img>
The <img> element adds an image to the web page. This is an empty, inline element, which means that images are treated like words in a sentence. The most important attribute of the <img> element is src, which specifies the file path of the image. The src may be a path to a local file (more on that in Section 5.5) or a URL, i.e., an image located anywhere on the web. We can also set image height and/or width using the height and width attributes, respectively.
For example, the following HTML document (example-01-04.html) contains one text paragraph and one image:
<!DOCTYPE html>
<html>
    <head>
        <title>Images</title>
    </head>
    <body>
        <p>This is the logo of the Leaflet JavaScript library</p>
        <img src="images/leaflet.png" width="300px">
    </body>
</html>
The result is shown in Figure 1.7. Note that for this code to work, a local Portable Network Graphics (PNG) image named leaflet.png needs to exist. Moreover, the image placement needs to correspond to the specified file path images/leaflet.png, which means that the leaflet.png file is in the images folder, inside the same directory as the index.html file. Again, don’t worry if this is not clear: we will learn about specifying file paths in Section 5.5.
FIGURE 1.7: example-01-04.html (Click to view this example on its own)
- Edit the previous example by replacing the file
srcfile path with the URL https://leafletjs.com/docs/images/logo.png.- Refresh the page.
- The image should now be loaded from a remote location—the https://leafletjs.com website—instead of a local file.
1.6.11 Tables
1.6.11.1 <table>, <th>, <tr>, and <td>
A table is defined using the <table> element, which contains one or more <tr> (table row) elements, each of which contains one or more <td> (table data) elements. The <td> element contains the contents of a single table cell. The first table row can be defined with <th> (table heading) elements instead of <td> elements. The heading is shown in bold font by default. Unless explicit dimensions are given, the table rows and columns are automatically sized to fit their contents.
The following HTML code creates a table with two rows and three columns. This particular table lists two of the JavaScript libraries we are going to use later on in the book:
<table>
    <tr>
        <th>Library</th>
        <th>Version</th>
        <th>Released</th>
    </tr>
    <tr>
        <td>Leaflet</td>
        <td>1.3.3</td>
        <td>2018-07-18</td>
    </tr>
    <tr>
        <td>Turf.js</td>
        <td>5.1.6</td>
        <td>2017-12-10</td>
    </tr>
</table>
The table, embedded in example-01-05.html, appears in the browser as shown in Figure 1.8. It may not look impressive, but keep in mind that table styling, such as alignment, border size, and color, etc., can be customized using CSS, which we learn about in Chapter 2. There are also several other element types that can go into the <table> element to make more complex tables, such as the <caption> element for adding a table caption.
FIGURE 1.8: example-01-05.html (Click to view this example on its own)
1.6.12 Grouping
1.6.12.1 Overview
The next HTML elements we discuss are <div> (Section 1.6.12.2) and <span> (Section 1.6.12.3). These are generic block-level and inline elements, respectively, which are used to group other elements and content, usually to associate each group with CSS styling rules (Chapter 2), or (mostly for <div>) with JavaScript code (Chapter 4).
1.6.12.2 <div>
The <div> element allows you to group a set of elements together in one block-level box. For example, you might create a <div> element to contain all of the elements for the header of your site (the logo and the navigation bar), or you might create a <div> element to contain comments from visitors.
In a browser, the contents of the <div> element will start on a new line, but other than this it will make no difference to the presentation of the page. Using an id or class attribute on the <div> element (Section 1.7 below), however, we can distinguish the <div> with specific appearance and behavior. For example, we can create styling rules (with CSS) to indicate how much space the <div> element should occupy on the screen (Section 2.8.4.2), where it should be placed (Section 2.8.4.6), change the appearance of all the elements contained within it, and so on.
Another use case of the <div> element is to create an empty container, or placeholder, to be populated with content on page load using JavaScript. We will use this technique throughout Chapters 6–13, when creating web maps with the Leaflet JavaScript library (Section 6.5.8).
1.6.12.3 <span>
The <span> element acts like an inline equivalent of the <div> element. It is used to do one of the following:
- Contain a section of text where there is no other suitable element to differentiate it from its surrounding text
- Contain a number of inline elements
Again, the most common reason why people use <span> elements is so that they can control the appearance of the content of these elements, using CSS.
1.6.13 Input elements
1.6.13.1 Overview
HTML supports several types of input elements. Input elements are used to collect information from the user and thus make the web page interactive. Buttons, check boxes, sliders, and text inputs are all examples of input elements. The search box on https://www.google.com is perhaps the most well-known example of a text-input element.
Input elements can be added with the <input> tag. The <input> element has several important attributes:
type—The type of inputname—The identifier that is sent to the server when you submit a form—a collection of related input elements (see below)value—The initial value in text and numeric inputs, or the text appearing on a button
Text area inputs are a special case, defined with the <textarea> element rather than with the <input> element (Section 1.6.13.5). Dropdown menu input is another special case, defined with the <select> and <option> elements (Section 1.6.13.8).
Input elements are commonly grouped inside a form, using the <form> element. This has several advantages for handling multiple inputs as a single unit. Through most of the book we will use simple, individual inputs—therefore to simplify the material we will avoid enclosing the inputs in a <form>. We will then come back to an example with a <form> element in Section 13.5.
Common input types are summarized in Table 1.5 and described in more detail in Sections 1.6.13.2–1.6.13.9. Note that there are many other possible input types that we will not use in this book, including specialized input elements for picking colors, selecting dates, etc.
| Input type | Usage |
|---|---|
| Numeric input | <input type="number"> |
| Range input | <input type="range"> |
| Text input | <input type="text"> |
| Text area | <textarea></textarea> |
| Radio buttons | <input type="radio"> |
| Checkboxes | <input type="checkbox"> |
| Dropdown lists | <select><option></option></select> |
| Buttons | <input type="button"> |
1.6.13.2 Numeric input
A numeric <input> element is used to get numeric input through typing or clicking the up/down buttons. A numeric input is defined using an <input> element with a type="number" attribute. Other important attributes are min and max, specifying the valid range of numbers that the user can enter. For example, the following HTML code creates a numeric input, where the user can enter numbers between 0 and 100, with the initial value set to 5:
The name attribute identifies the form control and is sent along with the entered information when submitting a form to a server. It is not very useful within the scope of this book but is shown here for completeness as it is commonly used in other contexts (Section 1.6.13.1).
The way that the above numeric input element appears in the browser, along with all other types of input we cover next (Sections 1.6.13.3–1.6.13.9), is shown in Figure 1.9. The numeric input is in the top-left corner if the figure. Note that the code for example-01-06.html includes CSS styling rules (which we learn about in Chapter 2) for arranging the input elements in three columns.
FIGURE 1.9: example-01-06.html (Click to view this example on its own)
1.6.13.3 Range input
A range <input> element is used for picking numeric values with a slider. This is usually more convenient and intuitive for the user in cases when the exact value is not important. A range input is defined using type="range". The purpose of the value, min, and max attributes is to specify the initial, minimal, and maximal values, respectively, just like in the numeric input (Section 1.6.13.2). Here is an example of a range input element:
The result is shown in Figure 1.9.
1.6.13.4 Text input
A text <input> is used for typing plain text. A text input is defined using type="text". For example, the following HTML code creates two text input boxes for entering first and last names, along with the corresponding labels7. The <br> element is used to place each text input box on a new line, beneath its label:
First name:<br>
<input type="text" name="firstname"><br>
Last name:<br>
<input type="text" name="lastname">
The result is shown in Figure 1.9.
1.6.13.5 Text area
A text area input is used for typing plain text, just like text input, but intended for multi-line rather than single-line text input (e.g., Figure 7.5). A text input is defined using the <textarea> element, as shown in the following example:
The result is shown in Figure 1.9.
1.6.13.7 Checkboxes
Checkboxes are used to select one or more (or none) of several options. Each checkbox is defined with a separate <input> element using type="checkbox". For example, the following HTML code creates two checkboxes, with labels:
<input type="checkbox" name="vehicle1" value="Bike"> I have a bike<br>
<input type="checkbox" name="vehicle2" value="Car"> I have a car<br>
The result is shown in Figure 1.9.
1.6.13.8 Dropdown menus
Dropdown lists, or dropdown menus, are used to select one option from a list. The list is initially hidden from view, expanding only when clicked. The list is also scrollable, therefore the number of items is potentially longer than can fit on screen. This makes dropdown lists suitable for situations when we have a long list of options the user needs to choose from, and we do not want to “waste” page space displaying all possible options at all times (e.g., Figure 10.4).
The dropdown menu is initiated using the <select> element. Inside the <select> element, each option is defined with a separate <option> element. For example:
<select name="cars">
    <option value="volvo">Volvo</option>
    <option value="suzuki">Suzuki</option>
    <option value="fiat">Fiat</option>
    <option value="audi">Audi</option>
</select>
The result is shown in Figure 1.9.
Note that in radio buttons (Section 1.6.13.6), checkboxes (Section 1.6.13.7) and dropdown menus (Section 1.6.13.8), the value attribute identifies the currently selected option when sending the data to the server. The value does not necessarily have to be identical to the text contents we see on screen when interacting with the input element in the browser. For example, in the above HTML code the first <option> has value="volvo", which is used to identify the option when sending data to a server, while the text shown on screen is actually "Volvo" (with capital V).
1.7 id, class, and style attributes
1.7.1 Overview
So far we have mostly encountered specific attributes for different HTML elements. For example, the src attribute is specific to <img> (and several other) elements and the href attribute is specific to <a> (and several other) elements. All HTML elements also share three important non-specific attributes, which can appear in any element:
id—Unique identifierclass—Non-unique identifierstyle—Inline CSS
The following Sections 1.7.2–1.7.4 cover the purpose and usage of these three non-specific attributes.
1.7.2 id
The id attribute is used to uniquely identify an HTML element from other elements on the page. Its value should start with a letter or an underscore, not a number or any other character. It is important that no two elements on the same page have the same value for their id attributes—otherwise the value is no longer unique.
For example, the following page has three <p> elements with id attributes. Note that the values of the id attribute—"intro", "middle", and "summary"—are different from each other and thus unique for each element.
<!DOCTYPE html>
<html>
    <head>
        <title>A Minimal HTML Document</title>
    </head>
    <body>
        <p id="intro">The 1st paragraph is an overview.</p>
        <p id="middle">The 2nd paragraph gives more details.</p>
        <p id="summary">The 3rd paragraph is a summary.</p>
    </body>
</html>
As we will see when discussing CSS (Chapter 2), giving an element a unique id allows us to style it differently than any other instance of the same element on the page. For example, we may want to assign one paragraph within the page a different color than all of the other paragraphs. When we go on to learn about JavaScript and interactive behavior (Chapter 4), we will also use id attributes to allow our scripts to uniquely affect the interactive behavior of particular elements on the page.
1.7.3 class
Every HTML element can also carry a class attribute. Sometimes, rather than uniquely identify one element within a document using an id, we will want to identify a group of elements as being different from all other elements on the page. For example, we may have some paragraphs of text that contain information that is more important than others and want to distinguish these elements, or differentiate between links that point to other pages on your own site and links that point to external sites.
To mark multiple elements as belonging to one group we can use the class attribute. The value of the class attribute identifies the group those elements belong to. For example, in the following HTML document, the first and third <p> elements share the class attribute value of "important".
<!DOCTYPE html>
<html>
    <head>
        <title>A Minimal HTML Document</title>
    </head>
    <body>
        <p class="important">The 1st paragraph is an overview.</p>
        <p>The 2nd paragraph gives more details.</p>
        <p class="important">The 3rd paragraph is a summary.</p>
    </body>
</html>
Just like an id, the class attribute is commonly used for styling, or interacting with, a group of elements on the page.
1.7.4 style
All elements may also have a style attribute, which allows inline CSS rules to be specified within the element’s start tag. We will talk about inline CSS in Section 2.7.2.
1.8 Code layout
When writing code, it is useful to keep a uniform code layout. For example, we can use tabs to distinguish content that is inside another element, thus highlighting the hierarchical structure of code.
The following two HTML documents are the same as far as the computer is concerned, i.e., they are displayed exactly the same way in the browser. However, the second HTML document is much more readable to humans thanks to the facts that:
- Each element starts on a new line.
- Internal elements are indented with tabs.
1.9 Inspecting elements
When looking at the HTML code of a simple web page, such as the ones we created in this chapter, it is easy to locate the HTML element responsible for creating a given visual element we see on screen. However, as the HTML code becomes longer and more complex, it may be more difficult to make this association.
Luckily, browsers have a built-in feature for locating HTML code associated with any element you see on screen. For example:
- Open the example file named
example-01-01.htmlin Chrome. - Press Ctrl+Shift+I or F12.
The screen should now be split. The left pane still shows the web page. The right pane shows the developer tools. The developer tools are a set of web authoring and debugging tools built into modern web browsers, including Chrome. The developer tools provide web developers access into the internals of the browser and the web page being displayed.
- Press Ctrl+Shift+C.
This toggles the Inspect Element mode. (It also opens the developer tools in the Inspect Element mode if they are not already open.) In the Inspect Element mode, you can hover above different parts of the page (left pane) with the mouse pointer. The relevant elements are highlighted, and their name is shown (Figure 1.10). Clicking on an element highlights the relevant part of the page source code and scrolls it into view. This also works in the opposite direction: hovering over the code in the right pane highlights the respective visual element in the left pane.
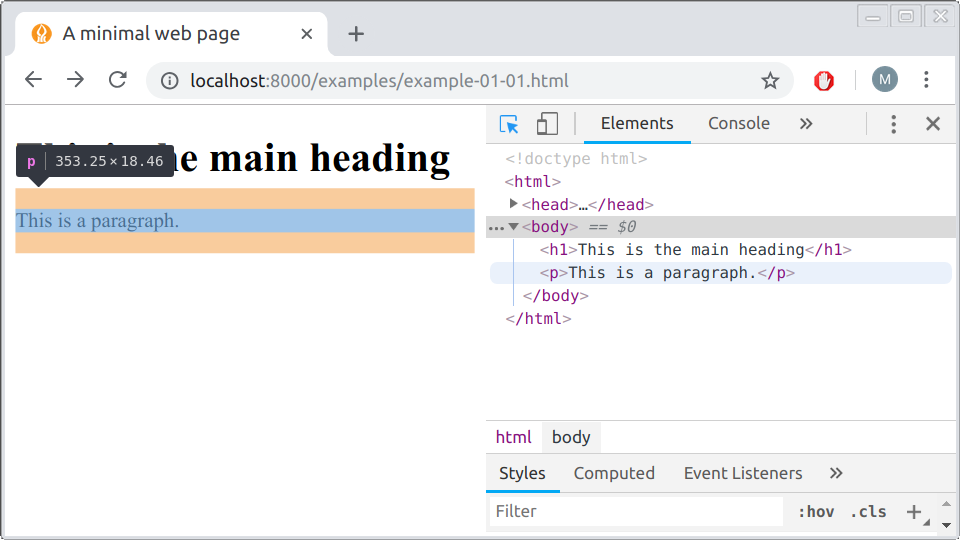
FIGURE 1.10: Using the Inspect Element tool in Chrome
Remember how we mentioned that every (block-level) HTML element can be thought of as a horizontal box, where (by default) height is determined by amount of content and width is set to maximum of browser width (Section 1.5.3)? This becomes evident when the Inspect Element tool highlights those boxes (Figure 1.10).
1.10 Exercise
- Edit the minimal HTML document
example-01-01.htmlto experiment with the HTML element types we learned in this Chapter:- Modify the title of the page and the first-level heading.
- Delete the existing paragraph and add a new paragraph with two to three sentences about a subject you are interested in.
- Use the appropriate tags to format some of the words in italic or bold font.
- Use the
<a>tag to add a link to another web page. - Add a list with two levels, i.e., a list where each list item is also a list.
- Add images which are loaded from another location on the internet, such as from Flickr.
References
Murrell, Paul. 2009. Introduction to Data Technologies. Boca Raton, FL, USA: Chapman; Hall/CRC.
The book has a freely available PDF version here: https://www.stat.auckland.ac.nz/~paul/ItDT/.↩
Opening an HTML document by double clicking on it is quick and simple, yet it is not suitable for displaying more complex web page components, which we are going to use starting from Chapter 7. In Chapter 5 we are going to learn the “right” way to view a web page we are developing—using a web server.↩
See Section 0.5 for a list of recommended plain text editors.↩
A list of HTML elements can be found in various online resources, such as the HTML elements reference (https://developer.mozilla.org/en-US/docs/Web/HTML/Element) by Mozilla.↩
Labels for input elements can also be created using the specialized
<label>element (https://developer.mozilla.org/en-US/docs/Web/HTML/Element/label), rather than using simple text as shown in the example. The advantage of<label>is that clicking on the text within the label triggers the associated input. This is not crucial for the purposes of this book, so we will use plain text labels rather than<label>elements for simplicity, as shown in the example.↩