Chapter 5 Web Servers
Last updated: 2020-06-24 13:45:22
5.1 Introduction
So far we have primarily dealt with the code—HTML (Chapter 1), CSS (Chapter 2), and JavaScript (Chapter 3–4)—required for building a website. We have not yet considered, however, the infrastructure required for hosting a website on a server, and the nature of communication between that server and the client, the web browser.
As mentioned in Chapter 1, at the most basic level a web page is an HTML document which is located at a node on the internet. This node is called a server, as it serves the file to the world wide web, allowing your computer, the client, to access it. When you open a web browser, such as Chrome, and enter a URL, such as https://www.google.com/, into the address bar, the web browser navigates to the node you have specified and requests this document, which it reads, interprets, and displays on our screen. The browser also applies CSS styling rules (Chapter 2) and runs JavaScript code (Chapter 4), in case those are linked to the document.
This means that to host a website you need to take care of two things:
- You need to have the right kinds of documents and code files.
- You need to have a location on the internet (hardware) where you can place these documents and code files, as well as an appropriate environment (software) to serve them.
We already discussed what kind of documents and code files we can use to build a website. Specifically, we learned about:
We have also seen how our customized HTML documents, along with any associated files, such as CSS and JavaScript, can be created using a plain text editor, such as Notepad++, then opened and viewed in the browser. The natural question that arises is what do we need to do to make the next step and turn our page into a “real” website, one that can be accessed and viewed by other people rather than just us.
In this chapter we focus on exactly that, the second part of the picture: having a location where our documents are placed, and software to publish or serve them over the network, so that they are accessible to other people.
5.2 Web servers
The term web server can refer to hardware or software, or both of them working together, for serving content over the internet. On the hardware side, a web server is a computer that stores a website’s component files, such as:
- HTML documents
- CSS stylesheets
- JavaScript files
- Other types of files, such as images
The server delivers these files to the client’s device. It is connected to the internet and can be accessed through a URL such as https://www.google.com/.
On the software side, a web server includes several parts that control how web users access the hosted files. The minimal required software component is an HTTP server. An HTTP server is a software component that understands URLs (web addresses) and Hypertext Transfer Protocol (HTTP)—the protocol used by the browser to communicate with the server (Section 5.3). A server with just the HTTP server component is referred to as a static server (Section 5.4.2), as opposed to a dynamic server (Section 5.4.3) which has several additional components.
At the most basic level, whenever a browser needs a file hosted on a web server, the browser requests the file via the HTTP protocol (Section 5.3). When the request reaches the correct web server (hardware), the HTTP server (software) sends the requested document back, also through HTTP (Figure 5.1).

FIGURE 5.1: Client-server communication through HTTP
Don’t worry if this is not clear yet—we elaborate on HTTP servers, the HTTP protocol, URLs, static and dynamic servers, in the following Sections 5.3–5.4.
5.3 Communicating through HTTP
5.3.1 Web protocols and HTTP
HTTP is a protocol specifying the way that communication between the client and the server takes place. As its name—Hypertext Transfer Protocol—implies, HTTP is mainly used to transfer hypertext (i.e., HTML documents) between two computers.
HTTP is not the only protocol in use for communication on the web. For example, FTP and WebSocket are examples of other web communication protocols. However, HTTP is the most basic and most commonly used protocol. Almost everything we do online, including everything we do in this book, is accomplished through HTTP communication. The secured version of HTTP, known as HTTPS, is becoming a very common alternative to HTTP and thus should be mentioned. However, HTTPS just adds a layer of security through encrypted communication and is not fundamentally different from HTTP.
In the context of the web, a protocol is a set of rules for communication between two computers. HTTP, specifically, is a textual and stateless protocol:
- Textual means that all commands are plain-text, therefore human-readable.
- Stateless means that neither the server nor the client remember previous communications. For example, an HTTP server, relying on HTTP alone, cannot remember if you are “logged-in” with a password, or in what step you are in a purchase transaction.
Furthermore, only clients can make HTTP requests, and then only to servers. Servers can only respond to a client’s HTTP request. When requesting a file via HTTP, clients must provide the file’s URL. The web server must answer every HTTP request, at least with an error message. For example, in case the requested file is not found the server may return the “404 Not Found” error message. The 404 error is so common that many servers are configured to send a customized 404 error page.
- Try navigating to https://google.com/abcde.html, or any other non-existing document on https://google.com/.
- What you see is Google’s customized 404 error page.
5.3.2 HTTP methods
5.3.2.1 Overview
The HTTP protocol defines several methods, or verbs, to indicate the desired action on the requested resource on the server. The two most commonly used HTTP methods, for a request-response between client and server, are GET and POST:
GET—Used to request data from the server (Section 5.3.2.2)POST—Used to submit data to be processed on the server (Section 5.3.2.3)
There are a few other methods, such as PUT and DELETE, which are used much more rarely and we will not go into.
5.3.2.2 The GET method
The GET method is used to request data. It is by far the most commonly used method in our usual interaction with the web. For example, typing a URL in the address bar of the browser in fact instructs the browser to send a GET request to the respective server. A static server (Section 5.4.2) is sufficient for processing GET requests in case the requested file is physically present on the server. The response is usually an HTML document, which is then displayed in the browser, but it can also be other types of content, such as GeoJSON (Section 3.11.2).
In addition to manual typing in the browser address bar, GET requests can also be sent programmatically, by running code. In this book, we will frequently send GET requests using JavaScript code. For example, in the following chapters we will learn about a method for loading GeoJSON content from local files (Section 7.8.1), or from remote locations on the web (Sections 7.8.2 and 9.7), using GET requests.
5.3.2.3 The POST method
The POST method is used when the client sends data to be processed on the server. It is more rarely used compared to GET, and somewhat more complicated. For example, there is no way to send a POST request by simply typing a URL in the browser address tab, unlike with GET. Instead, making a POST request to a web server can only be made through code, such as JavaScript code. Also, a dynamic server (Section 5.4.3) is required to process POST requests, where server-side scripts determine what to do with the received data. Plainly speaking, POST requests are preferred over GET requests when we need to send substantial amounts of data to the server.
In this book, we will encounter just one example of using POST requests, in Chapter 13. In that chapter, we will build a crowdsourcing web application where the user draws layers on a web map. These layers are subsequently sent for permanent storage in a database. Sending the drawn layer to the server (Section 13.6) will be accomplished using POST requests.
5.4 Static vs. dynamic servers
5.4.1 Overview
Web servers can be divided in two general categories:
- Static web servers
- Dynamic web servers
What we discussed so far, and what we use in this book44, refers to static servers. Dynamic servers have some additional complexity, and we will only mention them, for general information, in Section 5.4.3.
5.4.2 Static servers
As noted previously, a static server consists of a computer (hardware) with just an HTTP server (software). We call it “static” because the server sends its hosted files “as-is” to your browser, without any additional pre-processing. This means the static server can only respond to GET requests (Section 5.3.2.2) for pre-existing HTML documents, or other types of files, and send those documents to the browser. While loading the HTML document, the browser may send further GET requests for other pre-existing files linked in the HTML code, such as CSS, JavaScript, images, and so on.
For example, suppose we are vising a hypothetical website focused on travel locations, and we are navigating to a specific page on travelling to France, at http://www.travel.com/locations/france.html. In case the website is served using a static server, there is an actual france.html document on the server. All the server has to do is send you a copy of that file (Figure 5.2).

FIGURE 5.2: Static server architecture
As another example, the online version of this book (Section 0.7)—which you are, perhaps, reading at the moment—is hosted on a static server. This means that all of the HTML documents comprising the website are prepared in advance. Entering a URL for a specific page (such as web-servers-1.html, for this chapter) sends the appropriate file to your browser through HTTP.
5.4.3 Dynamic servers
A dynamic server consists of an HTTP server plus extra software, most commonly an application server and a database. We call it “dynamic” because the server dynamically builds the HTML documents, or any other type of content, before sending them to your browser via the HTTP server. Typically, the dynamic server uses its application server, i.e., software running server-side scripts, HTML templates, and a database to assemble the HTML code. Once assembled, the dynamically assembled HTML content is sent via HTTP, just like static content.
With a dynamic server, when entering the above-mentioned hypothetical URL, http://www.travel.com/locations/france.html, into the address bar in our browser, the france.html document doesn’t exist yet. The server waits for your request, and when the request comes in, it uses various “ingredients” (e.g., templates, a database, etc.) and a “recipe” to create that page on the spot, just for you (Figure 5.3).

FIGURE 5.3: Dynamic server architecture
For example, websites like Wikipedia are composed of many thousands of separate web pages, but they aren’t real HTML documents, only a few HTML templates and a giant database. This setup makes it easier and quicker to maintain and deliver the content45.
5.4.4 Software
As we will see shortly (Section 5.6), running a static server is easy to do on our own—assuming we already have our web page documents prepared. An HTTP server is included in many software packages and libraries, and it does not require any special installation or configuration. There are numerous software solutions which can start an HTTP server in a few minutes; Python (Section 5.6.2) and R are just two examples. There are also several free cloud-based options to have a managed static server such as GitHub Pages (Section 5.6.3), which means you do not even need to have your own dedicated computer or invest in paid cloud-based services to run your static server. There are also professional HTTP server software packages, used for building both static and dynamic servers, which we will not use in this book. At the time of writing, two most commonly used ones are Apache HTTP Server and Nginx.
Setting up and running a dynamic server is more complicated, requiring specialized installation, configuration, and maintenance. There are no instant solutions, such as the ones we will see shortly for static servers (Section 5.6), since it is up to us to define the way in which the server dynamically generates HTML content. The latter is done by setting up an application server and writing custom server-side scripts. With a dynamic server, in addition to the HTTP server software, you need to write server-side scripts which run on the server, as opposed to client-side JavaScript scripts that run on the client (Chapter 4). Server-side scripts are responsible for tasks such as generating customized HTML content, authentication, managing user sessions, etc. There are several programming languages (and frameworks) that are commonly used for writing server-side scripts, such as PHP, Python (Django), Ruby (on Rails), and JavaScript (Node.js).
5.4.5 Practical considerations
There are advantages and disadvantages to both the static and the dynamic server approaches. Static sites (i.e., sites served with a static server) are simple, fast, and cheap, but they are harder to maintain (if they are complex) and impersonal. Dynamic sites provide more flexibility and are easier to modify, but also slower, more expensive, and technically more difficult to build and handle.
In this book, we will only build static sites hosted using a static web server. A static server cannot use a database or template to send personalized HTML content, just pre-compiled HTML documents. Nevertheless, as we will see throughout the book, a static server is not limited to showing fixed, non-interactive content. For example, the HTML content of the web page can be modified in response to user actions through client-side scripts (in JavaScript), without needing a server, using the methods we learned in Chapter 4. Later on, we will also see that static pages can dynamically “grab” information from other locations on the web, again using client-side JavaScript, including from existing dynamic servers and databases (Section 9.7). That way, we can integrate dynamic content even though we do not operate our own dynamic server. Still, there are things that can only be accomplished with a dynamic server.
The most notable example where a dynamic server is an obvious (and only) solution is authentication. For example, suppose we want to create a password-protected website. In our website, we can add a form with an input element (Section 1.6.13) where the user enters a password, and only if the password is valid—the content will be shown. This requires authentication—some way to evaluate the validity of the entered password. Now, suppose we have a database of valid passwords for the various authorized website users. Where can we place that database, and how can our page access it? If we place it directly on the client, e.g., as an array (Section 3.6.3.1) in our JavaScript code, the contents will be exposed to anyone looking at the source code of our page. Remember that whenever a JavaScript script is linked to our HTML document, the user can access and view the code. Even if we place the password database on a different location, such as a separate static server, we still need to hard-code the instructions for accessing that other location in our JavaScript code, so that the web page can access it. Again, anyone who reads those instructions can access the database the same way the browser does. The solution is to send the user-entered password for validation using a server-side script. If the password is valid, the server can return an “OK” message and/or any content that the specific user is allowed to see. That way, the password database is not accessible, since the server is not allowed to send it—only to accept an entered password and compare it to those in the database.
From now on, we concentrate on static servers and how to set them up.
5.5 URLs and file structure
5.5.1 URLs and index.html
As we will see in a moment (Section 5.6), a static server is associated with a directory on the computer, serving its contents over the web. Once the server is running, a client can request any HTML document (or other type of file) which is located inside that directory, or any of its sub-directories, by entering a Uniform Resource Locator (URL) in the browser address bar. To construct the right URL for accessing a given HTML document (or other resource), one needs to know two things:
- The IP address of the host computer and the port where the server is running, or, alternatively, the domain name (see below)
- The path to the HTML document on the server
For example, the online version (Section 0.7) of Chapter 5, which you are reading right now, can be reached by entering the following URL into the browser address bar:
http://159.89.13.241:8000/web-mapping/web-servers-1.html
Let’s go over the separate components this URL is composed of:
http://means we are communicating using HTTP. This part is automatically completed by the browser, so it can be omitted.159.89.13.241is the IP address of the web server that hosts the website. The IP address is a unique identifier given to a computer connected to a network, making it possible to identify the computer in the network.:8000is the port number where the server is running (Section 5.6.2.2). When using the default port for a given communication protocol, which is80for HTTP and443for HTTPS, the port number can be omitted./web-mapping/web-servers-1.htmlis the location of the document. With a static server, this means that within the directory we are serving there is a sub-directory namedweb-mapping, and inside it there is an HTML document namedweb-servers-1.html46.
What happens if we remove the last part—the HTML file name web-servers-1.html—from the URL, thus navigating to the /web-mapping/ directory instead?
http://159.89.13.241:8000/web-mapping/
Try it, and you should see the index.html page (the book’s Preface), even though we did not specify any HTML file name. This happens because standard protocol dictates that a file named index.html will be provided by default when we navigate to a directory, rather than an HTML document, on the web server. The index.html file usually contains the first page users see when navigating to a website.
You may now be wondering how come we are usually navigating to a textual URL such as https://www.google.com, rather than a numeric IP address and port number, such as http://216.58.206.14:80/? The answer is something called a Domain Name Server (DNS). When you enter a textual URL into your browser, the DNS uses its resources to resolve the domain name into the IP address for the appropriate web server. This saves us the trouble of remembering IP addresses, using more recognizable textual addresses instead.
5.5.2 File structure
The following diagram shows a hypothetical file structure of a static website directory:
www
├── css
│   └── style.css
├── images
│   └── cat.jpg
├── js
│   └── main.js
├── dog.jpg
└── index.html
The various files that comprise the website are located either in the root directory or in sub-directories within the root directory. In the above example, www represents the root directory of the website. In this example, the root directory www contains a default index.html document. As mentioned above (Section 5.5.1), this means that when we browse to the directory address without specifying a file name, the index.html file is sent by default. The root directory www also contains sub-directories. Here, the sub-directories are used for storing additional files linked to the hypothetical HTML code of index.html:
css—for CSS files (.css)images—for imagesjs—for JavaScript files (.js)
The structure and names of the sub-directories are entirely up to us, web page developers. We can even place all of the files in the root directory, without any internal division to sub-directories. However, it is usually convenient to have the type of sub-directory structure as shown above, where files of different types are stored in separate sub-directories. That way, the various components that make up our website can be easier to track and maintain.
5.5.3 Relative paths
In the above file structure example, the images folder contains an image file named cat.jpg. In case we want this image to be displayed on the index.html page, the HTML code in index.html needs to include an <img> element (Section 1.6.10). The src attribute of that <img> element needs to refer to the cat.jpg file. Either one of the following versions will work:
Both versions of the src attribute value are known as relative file paths, because they are relative to a given location on the server:
- In the first case, the path is relative to the root directory of the server, specified by the initial
/symbol. - In the second case, the path is relative to the current directory where the HTML is loaded from, so the path just starts with a directory or file name in the same location (without the
/symbol).
In this particular example the index.html file is in the root directory, thus the current directory is identical to the root directory. Therefore the cat.jpg file can be reached with either /images/cat.jpg or images/cat.jpg. Incidentally, we have another image file dog.jpg in the root directory (which, again, is the current directory for index.html). We can insert the dog.jpg image into the index.html document using either of the following <img> elements:
This is another example of using paths that are relative to the root or current directory, respectively.
- In case the
index.htmlfile was moved (for some reason) from the root directory to theimagesdirectory, thesrcattribute in the<img>element for loadingcat.jpgwould have to be changed tosrc="/images/cat.jpg"or tosrc="cat.jpg".- Can you explain why?
5.5.4 CSS and JavaScript
5.5.4.1 Overview
As mentioned earlier (Sections 2.7.4 and 1.6.4.3), CSS and JavaScript code can be loaded from separate files, usually ending in .css and .js, respectively. This approach is preferred to using embedded CSS or JavaScript code (Section 2.7). Keeping CSS and JavaScript code in separate files takes a little more effort than embedding it directly in the HTML document, but saves work as our sites become more complex, because:
- Instead of repeating the same CSS and JavaScript code in different pages of the website, we can load the same file in all pages.
- When modifying our external CSS or JavaScript code, all web pages loading those files are immediately affected.
5.5.4.2 Linking CSS
Linking an external CSS file can be done using the <link> element within the <head> of the HTML document (Section 2.7.4). For example, in our hypothetical static server file structure (Section 5.5.2), the css folder contains a style.css file. This CSS file can be linked to the index.html document be including the following <link> element:
Note that, in this case, it makes sense to use a relative path which is relative to the root directory, since a website usually has a single set of CSS and JavaScript files. That way, exactly the same <link> element can be embedded in all HTML documents, regardless of where those HTML documents are placed.
5.5.4.3 Linking JavaScript
Linking a JavaScript code file can be done by adding a file path in the src attribute of a <script> element (Section 6.5.5). The <script> element can then be placed in the <head> or the <body> of the HTML document. For example, our hypothetical file structure has a folder named js with a JavaScript file named main.js. That script can be loaded in the index.html document by including the following <script> element:
Again, a relative path, relative to the root directory, is being used.
5.6 Running a static server
5.6.1 Overview
So far we have discussed several background topics related to running a static server:
- Communication through HTTP (Section 5.3)
- Difference between static and dynamic servers (Section 5.4)
- Components of a URL and the file structure on the server (Section 5.5)
What is left to be done is actually running a server, to see how it all works in practice. In the next two sections we will experiment with running a static web server using two different methods:
5.6.2 Local with Python
5.6.2.1 Setup instructions
We begin with the local option for running a static server. The exercise will demonstrate the HTTP server built into Python, which only requires you have Python installed. If you are working in a computer classroom, there is a good chance that Python is already installed. In any case, you can check if Python is installed by opening the Command Prompt (open the Start menu, then type cmd) and typing python. If you see a message with the Python version number, then Python is installed and you have just entered its command line, marked by the >>> symbol. You can exit the Python command line by typing exit() and pressing Enter. In case you see an error message, such as the following one, then Python is not installed:
'python' is not recognized as an internal or external command,
operable program or batch file.
Python installation instructions are beyond the scope of the book, but there is a plenty of information on installing Python that you can find online.
5.6.2.2 Running the server
To run Python’s HTTP Server, follow these steps:
- Open the Start menu and type
cmdto enter the Command Prompt. - Navigate to the directory (Section 5.5.2) that you want to serve (e.g., where your
index.htmlfile is), usingcd(change directory) followed by directory name. For example, if your directory is in driveD:\, inside a directory namedDataand then a sub-directory namedserver, you need to typecd D:\Data\serverto navigate to that directory. - Type the expression
python -m SimpleHTTPServer(if you are using Python 2) orpython -m http.server(if you are using Python 3). To check which version of Python you have, typepython -Vin the Command Prompt.
If all goes well, you should see a message such as the following (Figure 5.4), meaning that the server is running:
Serving HTTP on 0.0.0.0 port 8000 ...As evident from the above message, the default port (Section 5.5.1) where the Python server is running is 8000. In case you want to use a different port, such as 8080, you can specify the port number as an additional parameter:
To stop the server, press Ctrl+C.
5.6.2.3 Testing served page
Once the server is running, you can access the served web page(s) by navigating to the following address in a web browser, assuming there is an index.html file in the root of the served directory:
http://localhost:8000/In case you want to load an HTML document other than index.html, or if the document is located in one of the sub-directories of the server, you can specify the path to the HTML file you wish to load. For example:
http://localhost:8000/locations/france.htmlIf you initiated the server on a different port, replace the 8000 part with the port number you chose:
http://localhost:8080/locations/france.htmlThe word localhost means you are accessing this computer. In other words, the server and the client are the same computer. This kind of setting may seem strange, but in fact it is extremely useful for development and testing of websites. Having the client and server on the same computer means that we can simulate and test the way that a client accesses the website, without needing to deploy the website on a remote server which requires some more work (Section 5.6.3).
Python’s HTTP server prints incoming requests in the console, which is useful for monitoring how the server works. For example, the screenshot in Figure 5.4 shows several logged messages printed while using the server. In this particular printout, we can see that the server successfully processed four GET requests, all of which took place on February 22, in 2018, at around 15:08 (Figure 5.4).
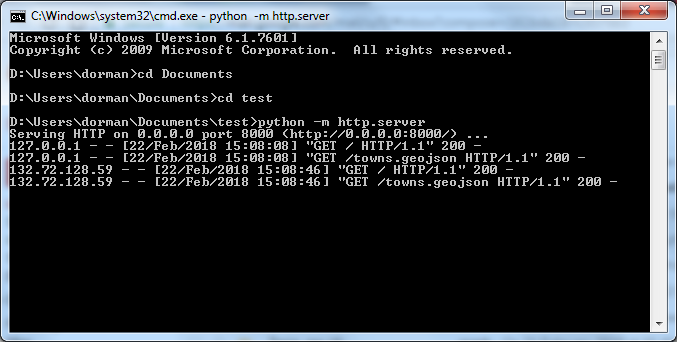
FIGURE 5.4: Running Python’s simple HTTP server
5.6.2.4 Interactive map example
The following two exercises will demonstrate the concept of running a static server, using Python’s HTTP server. In the first exercise, we will run the HTTP server to serve a web page with an interactive map of towns in Israel example-08-07.html (Figure 8.9). The purpose of this exercise is to become familiar with organization of multiple files in a static server directory. Don’t worry if you don’t understand the code that is in the files—it will be explained in detail later on (Section 8.8.2).
- Let’s try using a static HTTP server to serve a web page consisting of multiple files over the network.
- Locate and download the file named
example-08-07.htmlfrom the online version of the book (Section 0.7). Going over the source code, you will notice that the file is linked to one CSS file (css/leaflet.css) and one JavaScript files (js/leaflet.js). Additionally, the JavaScript code in the<script>ofexample-08-07.htmlloads a GeoJSON filedata/towns.geojsonusing a method called Ajax (Section 7.7).- Rename the
example-08-07.htmlfile toindex.htmland place it in an empty directory.- Create sub-directories named
css,jsanddataand place the appropriate files in each directory—leaflet.cssin thecssdirectory,leaflet.jsin thejsdirectory, andtowns.geojsonin thedatadirectory.- Start a local server from within the directory where the
index.htmlfile is placed, and open the page in the browser by navigating to http://localhost:8000/.- You should see a map of town borders, with highlighted names on mouse hover (Figure 8.9).
- Now try opening the
index.htmlfile by double-clicking on it; the towns layer may now be absent, because loading GeoJSON content from a file using the Ajax (Section 7.7) method is blocked by some browsers (such as Chrome), unless running a server (Section 7.8.1). This demonstrates the necessity of going through the trouble of running a local server, for correctly emulating the way that web content is being served during website development.
5.6.2.5 Access from a different computer
In the second exercise, we will try to navigate to a web page served from a different computer. Note that this exercise will not work under certain network settings, due to different complications that require some more effort to overcome. For example:
- If you are connected to the internet through a private network, e.g., behind a router at your home, then the IP address of your computer (shown with
ipconfig; see below) refers to an internal address of the private network, so other computers will not be able to reach your page simply by typing that IP address in the browser. - If there is a firewall preventing other computers from reaching yours, then they will not be able to navigate to the page that you are serving.
The above considerations are handled by network administrators and are beyond the scope of this book.
- While the page from the previous exercise is up and running, let’s try to access it from a different computer over the network. This exercise should be done in pairs.
- Start up the static server with the interactive map from the previous example.
- Identify the IP address of your computer. To do that, click on the Start button, type
cmdin the text box to open a second command line prompt (the first one should still run your server so you cannot type additional commands there!), then typeipconfigin the command line. Locate your IP address in the printed output (Figure 5.5). The address should be listed next to the line where it saysIPv4 Address. For example, in the output shown in Figure 5.5 the IP address is132.72.129.98.- Tell the person next to you what your IP address is, and which port your server is running on. For example, if your IP address was
132.72.129.98and the port number is8000then the address you should pass to the person next to you is http://132.72.129.98:8000/.- The other person should type the address in his/her browser. If all worked well, your website will be displayed. Check your server’s log—you should see the
GETrequest(s) and the IP of the other computer that connected to your website!

FIGURE 5.5: Determining the IP address using ipconfig
5.6.3 Remote with GitHub Pages
5.6.3.1 Overview
Python’s HTTP server is simple enough to start working with, but there are other difficulties if you intend to use it for production, i.e., in real-life scenarios, where stability is essential. For instance, you need to take care of the above-mentioned network administration issues (Section 5.6.2.5), such as making sure your server has an IP address that can be reached from other computers, i.e., a public IP address, and that the server is not behind a firewall. In addition, you need to make sure the IP address of the computer always stays the same (a static IP address), take care of the hardware of your server, such as making sure the computer is always running and connected to the internet, make sure that the server is restarted in case the computer restarts, and so on. Using a remote hosting service, we basically let other people handle all of that. In other words, we don’t need to worry for any of the hardware, software, and network connection issues—just the contents of our website.
There are numerous hosting services for static web pages. For example, both Google and Amazon, as well as many other smaller companies, offer paid static hosting services. In this section, we will use the GitHub platform for hosting our static web page hosting, which is free. Although GitHub is mainly a platform for online storage of Git repositories and collaborative code development, one of its “side” functions is that of a static server. The static server functionality of GitHub is known as GitHub Pages. Using GitHub Pages as a remote static server has several advantages for our purposes:
- It is simple.
- It is free.
- It is part of GitHub, a popular platform for collaborative code development, which is useful to become familiar with.
Another good alternative is surge.sh. It is also free, and can be quicker to set up compared to GitHub Pages, but requires using the command line.
5.6.3.2 Git and GitHub
We will not go into details on the functionality of GitHub, other than the GitHub Pages utility, which we use as a static server, but here is some background on what it is. When working with code, it becomes important to keep track of different versions of your projects. This allows you to undo changes made weeks or months ago. Versioning becomes even more important when collaborating with others, since in that case you may need to split your project into several “branches”, or “merge” the changes contributed by several collaborators back together. To do all of those things, people use version-control systems. One of the most popular revision control systems around today is Git.
If Git is a version-control system, then what is GitHub? Git projects are also called repositories. GitHub is a web-based Git repository hosting service. Basically, GitHub is an online service where you can store your Git repositories, either publicly or privately. The platform also contains facilities for interacting with other people, such as raising and discussing issues or subscribing to updates on repositories and developers you are interested in, creating a community of online code-collaboration. For anyone who wants to take part of open-source software development, using Git and GitHub is probably the most important skill after knowing how to write the code itself.
Importantly to our cause, for any public GitHub repository, the user can trigger the GitHub Pages utility to serve the contents of the repository. As a result, the contents of the repository will be automatically hosted at the following address47:
https://GITHUB_USER_NAME.github.io/REPOSITORY_NAME/
where:
GITHUB_USER_NAMEis the user nameREPOSITORY_NAMEis the repository name
Everything we learned about static servers applies in remote hosting too. The only difference is that the served directory is stored on another, remote server, rather than your own computer. For example, in order for a web page to be loaded when one enters a repository URL as shown above, you need to have an index.html file in the root directory of your GitHub repository (Section 5.5.1).
5.6.3.3 Setup instructions
What follows are step-by-step instructions for running a remote static server on GitHub Pages. To host our website on GitHub pages, go through the following steps:
- Create a GitHub account on https://github.com/ (in case you don’t have one already), then sign-in to your account. Your username will be included in all of the URLs for GitHub pages you create, as in
GITHUB_USER_NAMEin the URL shown above. In the screenshots in Figures 5.6–5.12, the GitHub username ismichaeldorman. - Once you are logged-in on https://github.com/, click the + symbol on the top-right corner and select New repository (Figure 5.6).
- Choose a name for your repository. This is the
REPOSITORY_NAMEpart that users type when navigating to your site, as shown in the above URL. In the screenshots (Figures 5.6–5.12) the chosen repository name istest. - Make sure the Initialize this repository with a README box is checked. This will create an (empty)
README.mdfile in your repository, thus exposing the Upload files screen which we will use to upload files into our repository. - Click the Create repository button (Figure 5.7).
- The newly created repository should be empty, except for one file named
README.md(Figure 5.8). - Click on the Settings tab to reach the repository settings.
- On the settings page, scroll down to the GitHub Pages section.
- In the Source panel, instead of None select master branch and click the Save button (Figure 5.9).
- Go back to the repository page and click the Upload files button. This will take you to the file upload screen (Figure 5.10).
- Drag and drop all files and folders that comprise your website into the box. This should usually include at least an HTML document named
index.html. - Wait for the files to be transferred. Once all files are uploaded, click the Commit changes button (Figure 5.11).
- That’s it! Your website should be live at http://GITHUB_USER_NAME.github.io/REPOSITORY_NAME/. Replace
GITHUB_USER_NAMEandREPOSITORY_NAMEwith your own GitHub user name and repository name, respectively48.
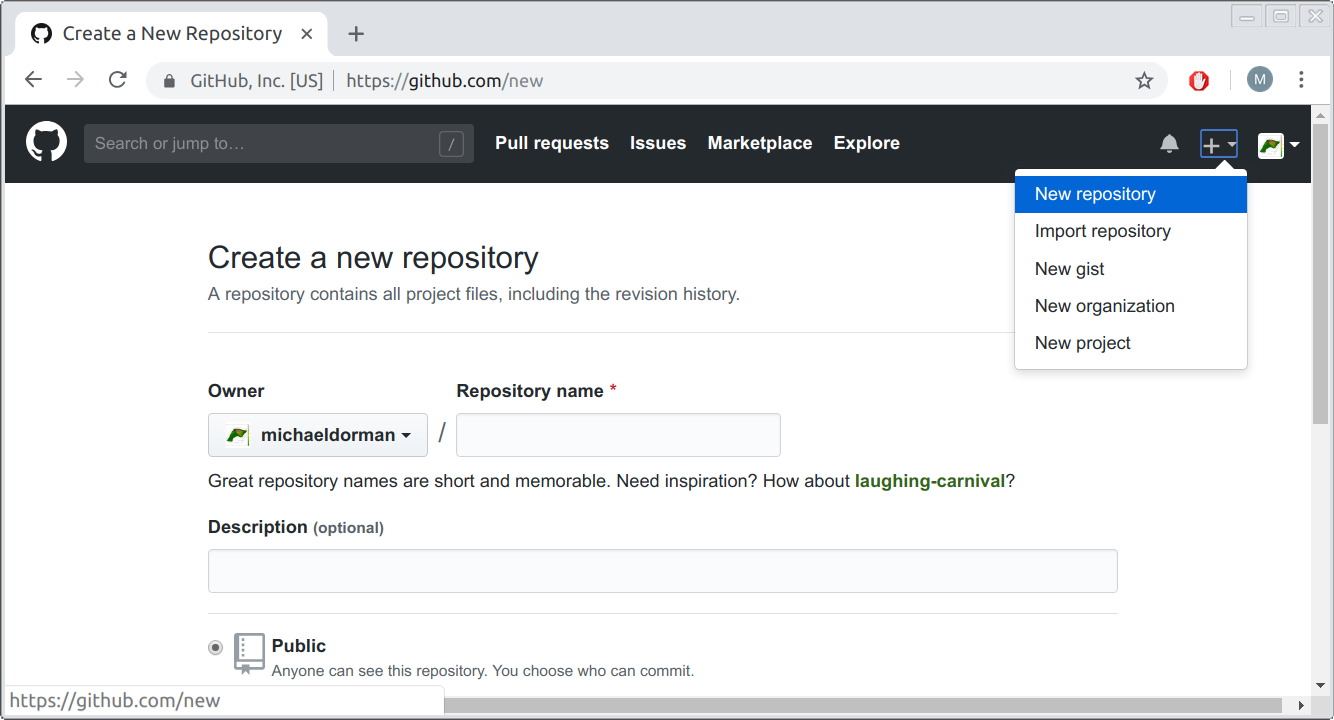
FIGURE 5.6: Creating a new repository on GitHub
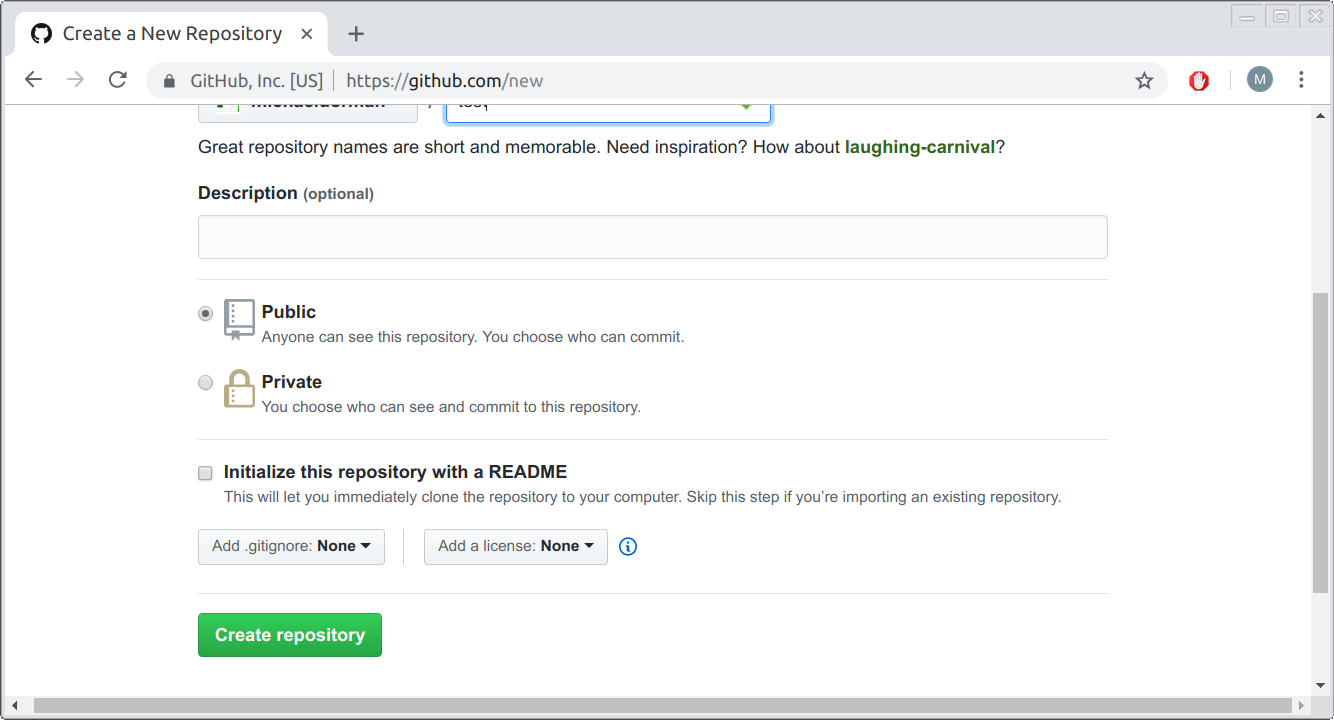
FIGURE 5.7: The Create repository button
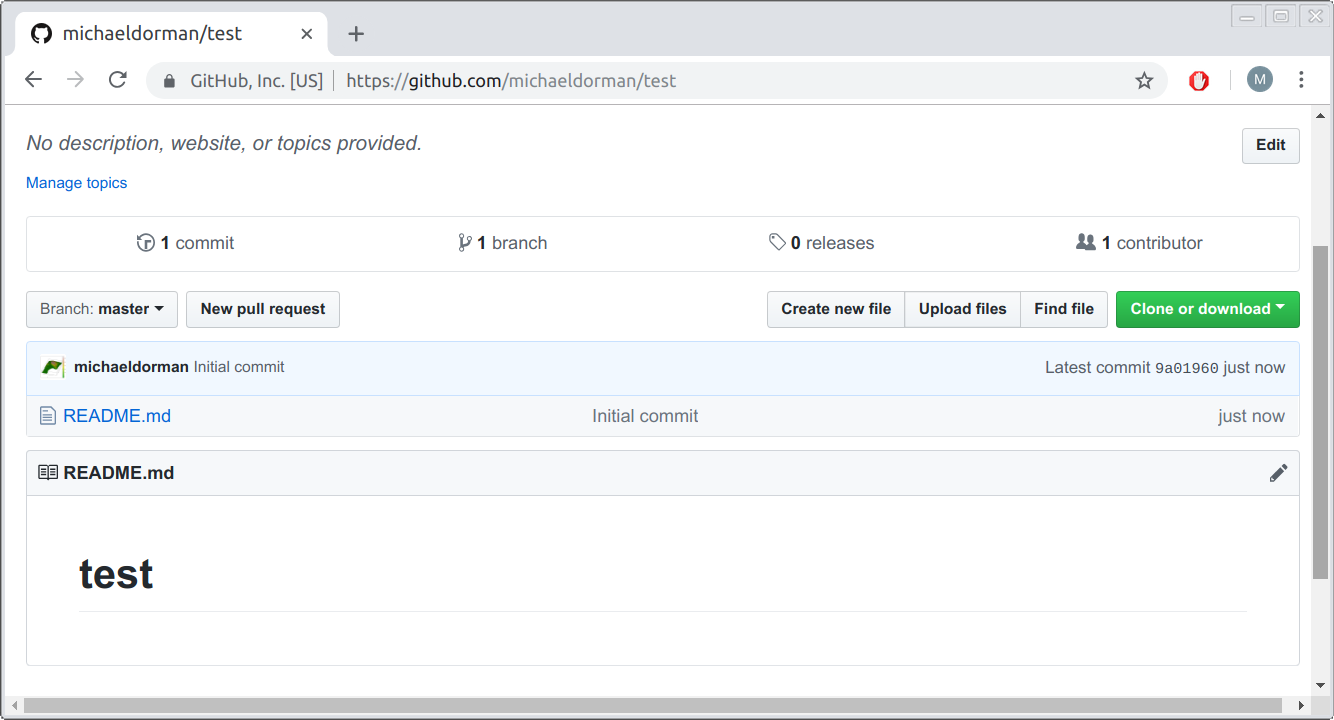
FIGURE 5.8: Newly created repository, with README.md file

FIGURE 5.9: Setting master branch as GitHub Pages source
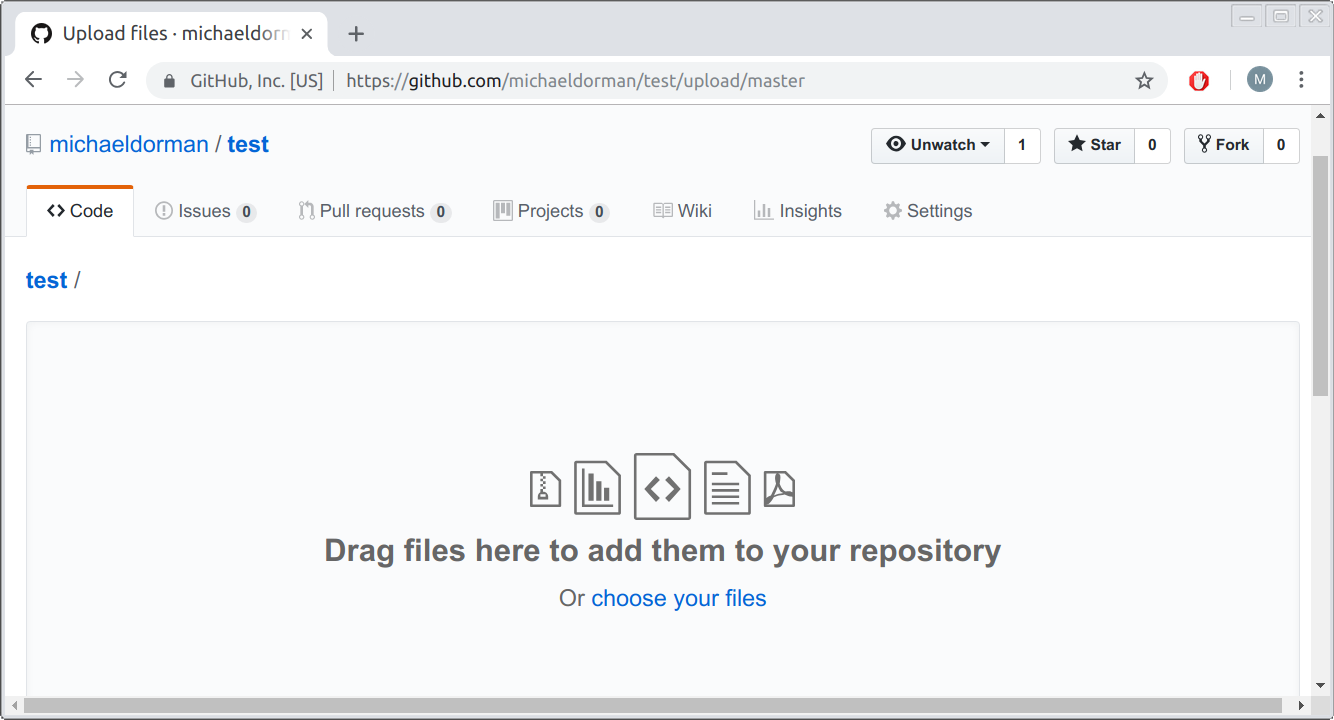
FIGURE 5.10: File upload screen
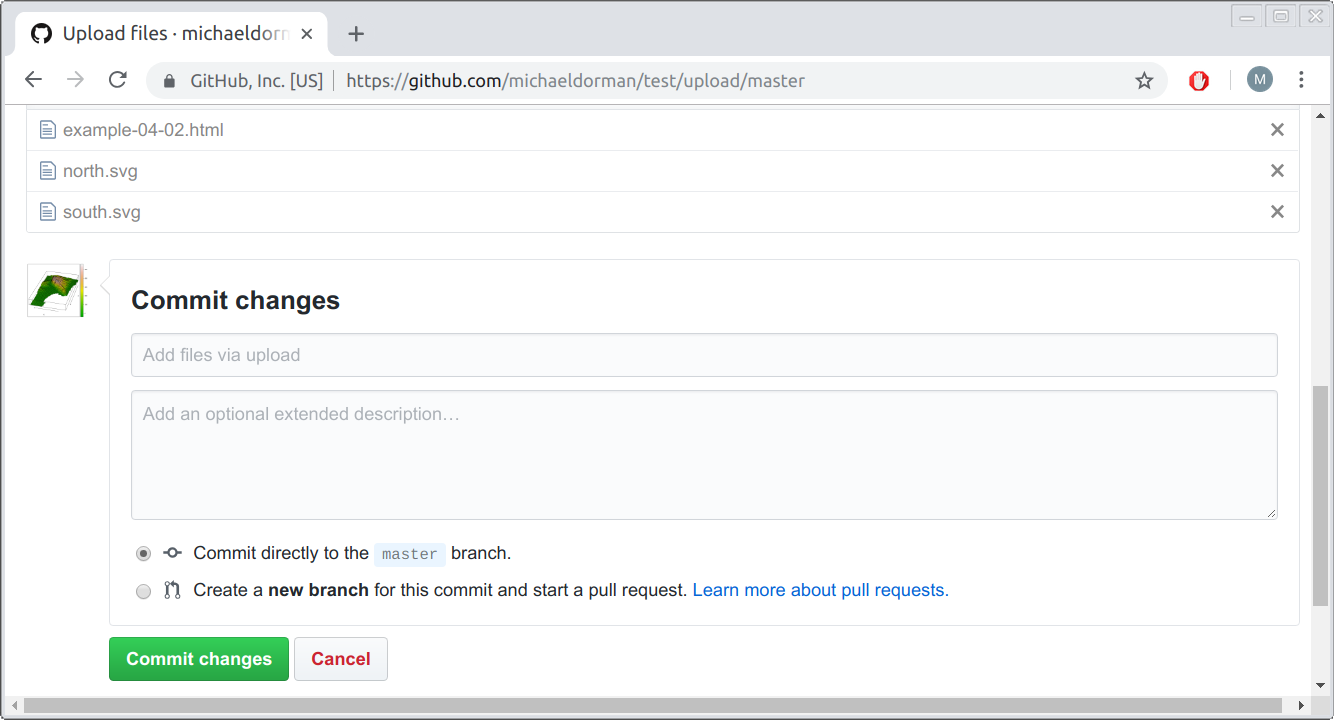
FIGURE 5.11: The Commit changes button
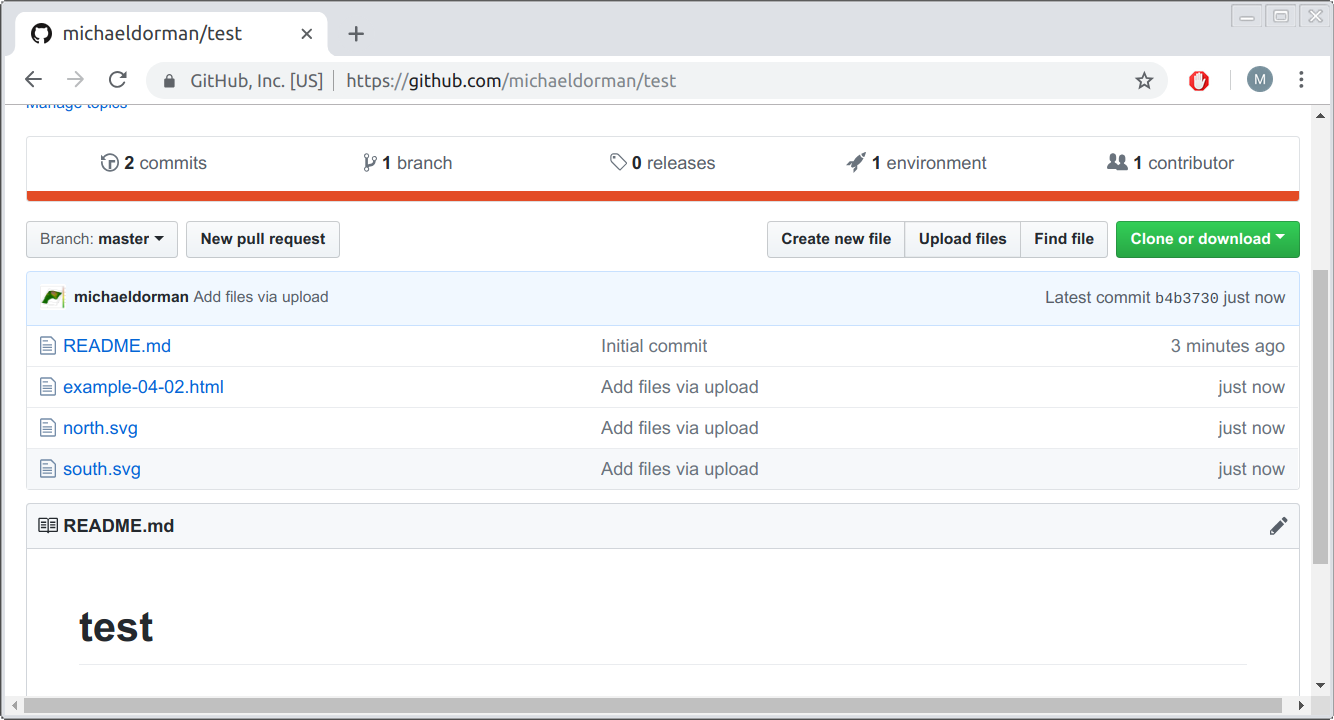
FIGURE 5.12: The repository with uploaded files
We will use a dynamic server established in advance by a company called CARTO in Section 9.2.↩
More information on the differences between static and dynamic servers can be found in the Introduction to the server side article (https://developer.mozilla.org/en-US/docs/Learn/Server-side/First_steps/Introduction) by Mozilla.↩
More information on URL structure can be found in the What is a URL? article (https://developer.mozilla.org/en-US/docs/Learn/Common_questions/What_is_a_URL) by Mozilla.↩
Starting from 2016, GitHub Pages enforces HTTPS, which is why the address starts with
https://. Typinghttp://is allowed but automatically redirects tohttps://.↩Note that you may have to wait a few moments before the site is being set up.↩