
General information
Contents
General information#
Last updated: 2023-02-25 13:40:01
Course details#
Course number: 128.1.0162
Time: Sunday 16:10-19:00
Place:
Building 35, room 403Building 72, room 249Instructor: Michael Dorman (mailto:dorman@post.bgu.ac.il)
Grading:
Home assignments 5 * 10% = 50% (see Home assignments)
Exam = 50% (see Exam)
Requirements:
Basic knowledge of GIS (e.g., “Intro to GIS” course)
Self study
Getting help:
Forum on Moodle (http://moodle2.bgu.ac.il)
Meetings (schedule by e-mail)
Lecture plan#
The course lecture plan is given in Table 26.
Lesson |
Topic |
Date |
|---|---|---|
01 |
introduction, Setting up the environment |
|
02 |
|
|
03 |
|
|
04 |
|
|
05 |
|
|
06 |
|
|
07 |
|
|
08 |
|
|
09 |
|
|
10 |
|
|
11 |
|
|
12 |
|
|
13 |
|
Home assignments#
Instructions#
Assignments should be prepared and submitted individually (not in pairs, etc.)
The solution needs to be submitted on Moodle, as a Jupyter notebook (i.e., a single
.ipynbfile).Specify the following details at the top of the notebook: assignment number, student name, student ID (Fig. 79).
Use headings (e.g.,
## Question 1and## Question 2in markdown cells) to mark the solution to question 1 and question 2 (Fig. 79).The notebook needs to run without errors, and produce (print) the required outputs, assuming the person who runs the notebook:
Has all packages used in the book installed (see Python packages).
Runs the notebook from within a directory that contains the
dataandoutputsub-directories, with the course sample data and output files (see sample-data).
Avoid exporting any files in your code!
Make sure your solution is as general as possible. Namely, do not use indices or specific values in your solution, other than the values given in the question text. For example, if the question is “find the largest value in the list
x=[4,7,9,2,8,5], the solutionx[2]is wrong, because it uses the specific value2.You can use any function or method in the Python standard library (https://docs.python.org/3/library/) to solve the exercises, even if it is not in the material. However, you can only use third-party Python packages which are covered in the material (see what-are-we-going-to-learn); you cannot use any other third-party package in your solution.
When the solution requires importing one of the sample data files (see sample-data), use a relative path starting with
"data", as in"data/carmel.csv". In other words, assume that the notebook is going to be executed in a a directory which contains a sub-directory nameddatawith all sample data files listed in Table 3.
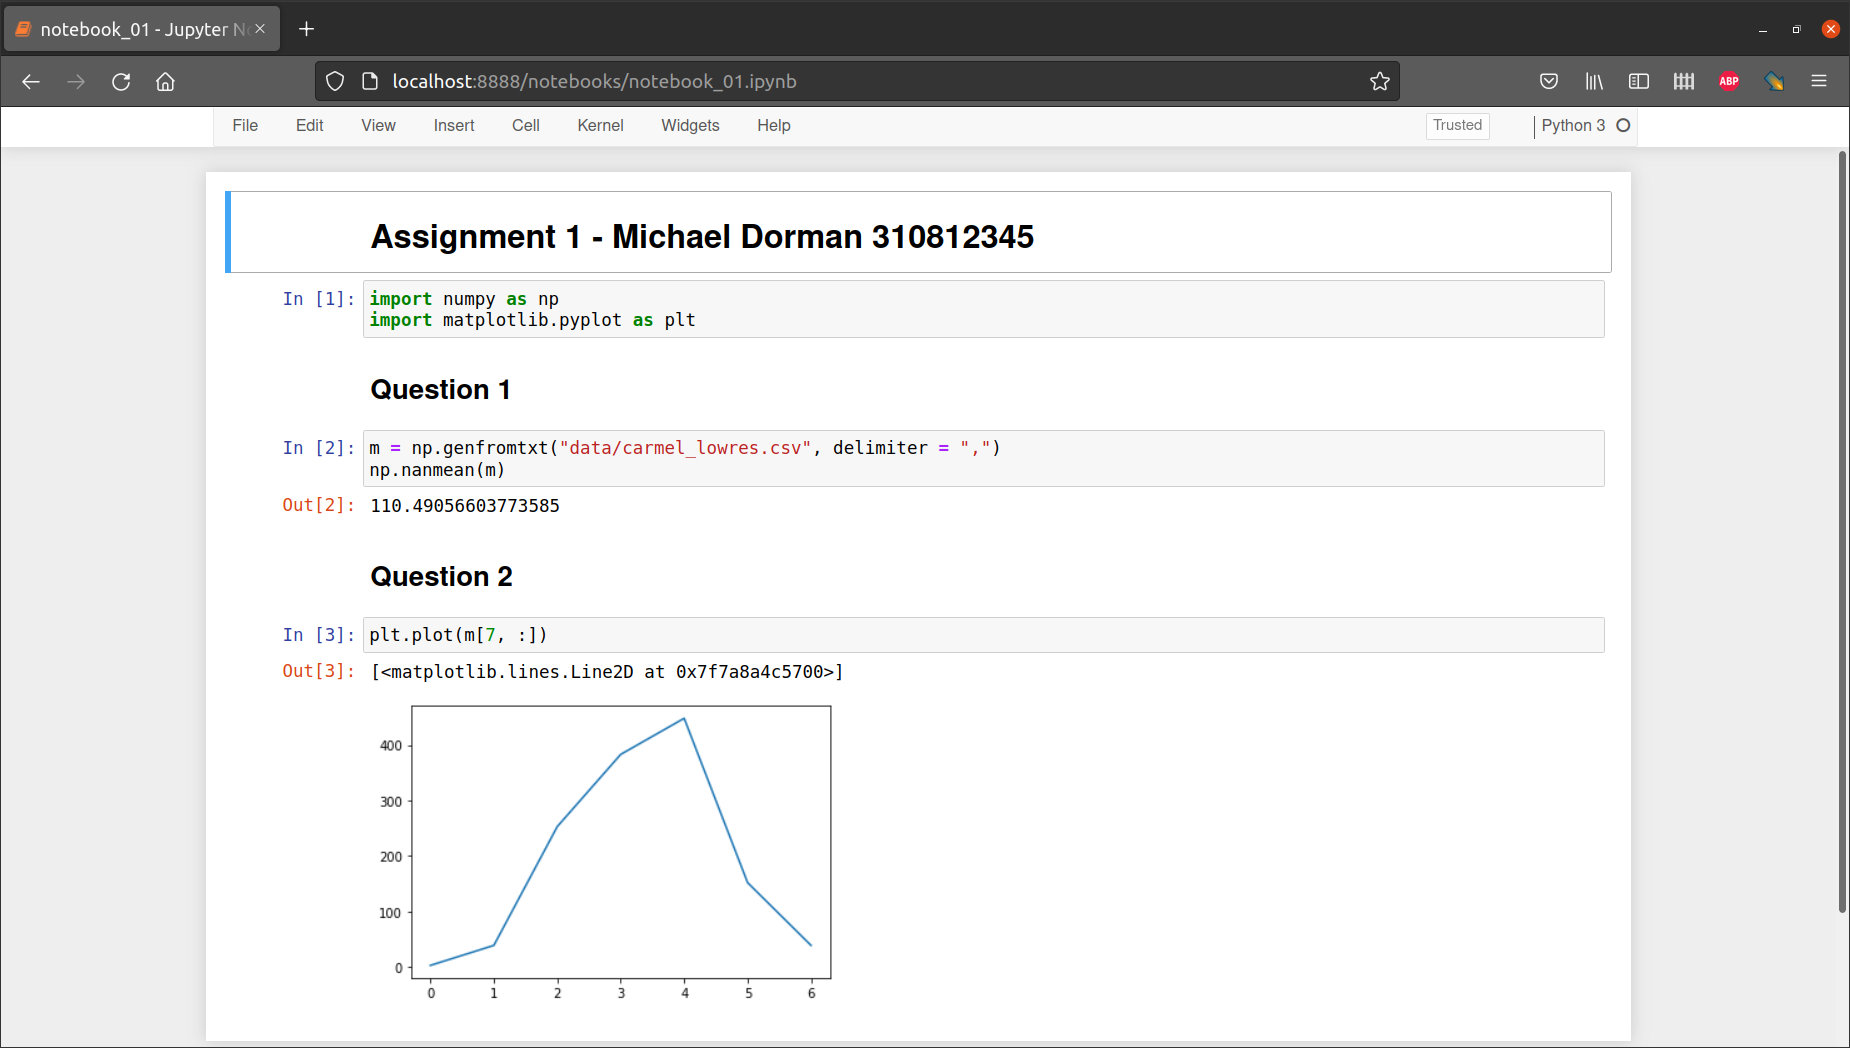
Fig. 79 Structure of .ipynb file for a submitted assignment#
Submission dates#
The sumbission dates of home assignments are given in Table 27.
Assignment |
Topic(s) |
Date |
|---|---|---|
|
||
|
||
|
||
|
||
|
Recordings#
2022#
Working with the virtual image#
Step 1: Start the virtual image#
Go to https://apps.bgu.ac.il/
Click “Next”
Type your BGU username and password
Click on the “Geography” icon
Click “Launch”
Click on “Open Horizon Client”
Select “Open with VMware Horizon Client” if asked
Step 2: Download sample data#
From the desktop, open the link named “Spatial Data Programming with Python”, and download the sample data (see sample-data) (Fig. 80)
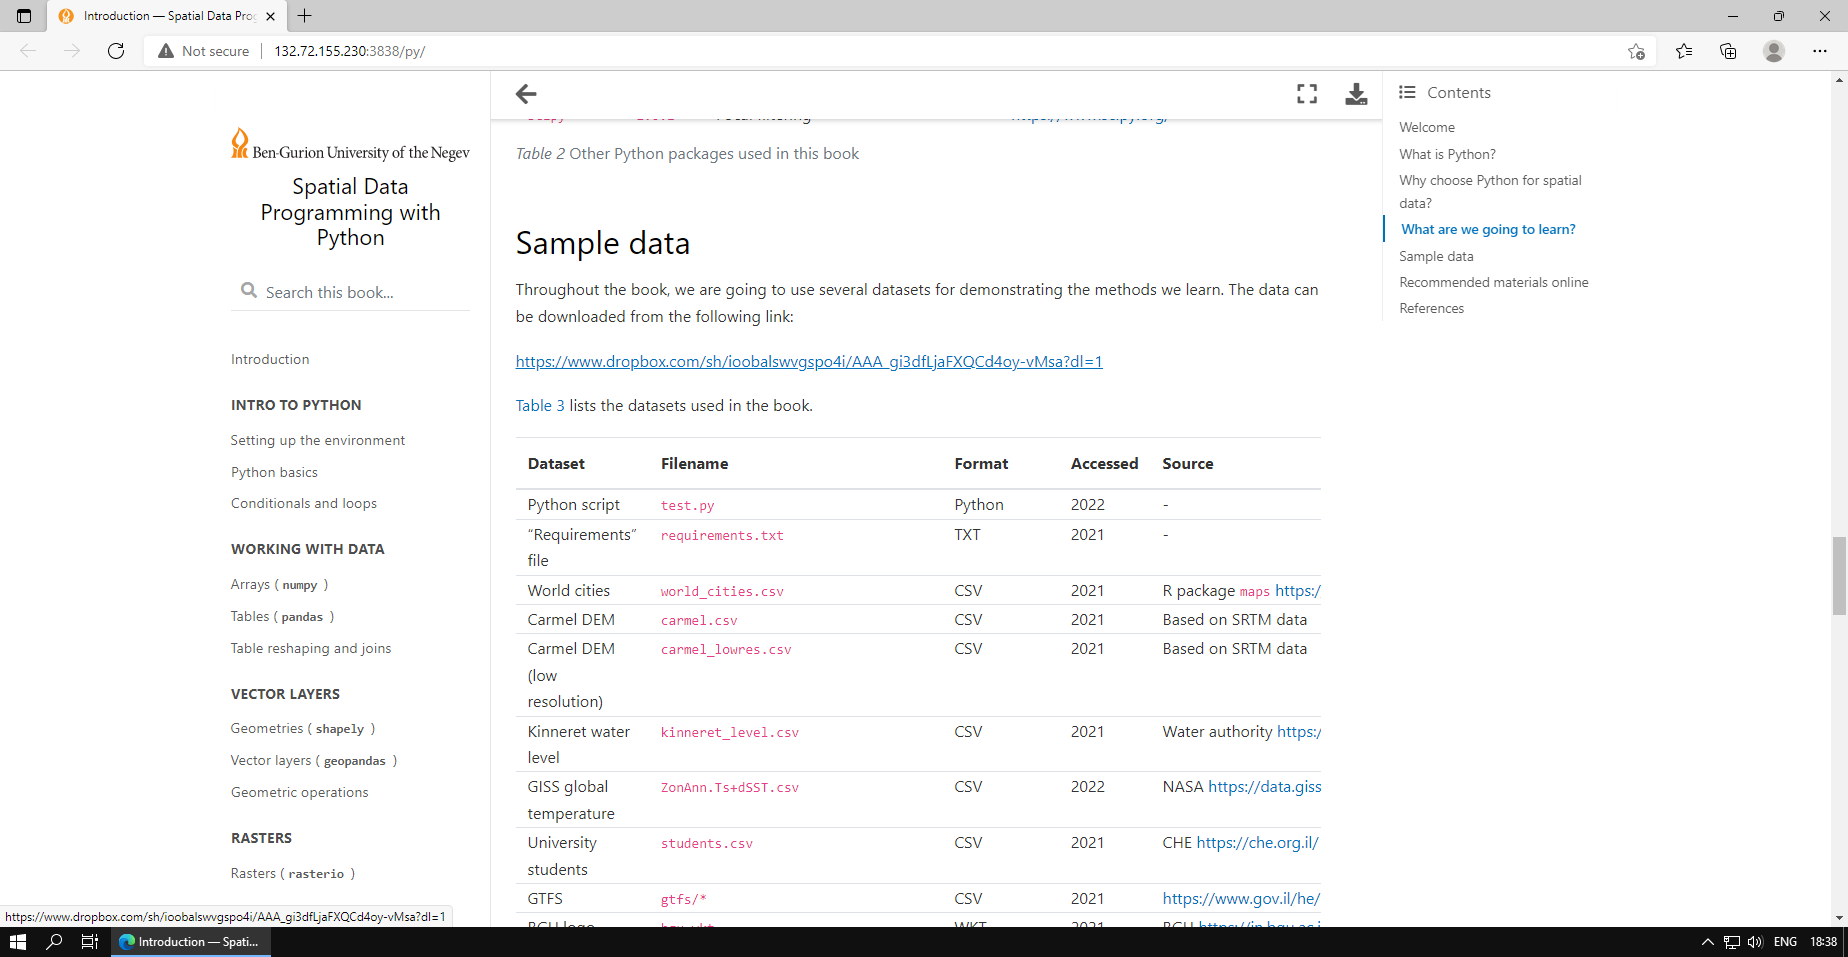
Fig. 80 Downloading sample data#
Again from the desktop, go to “This PC”, then to “Downloads”
You should see the file named
datawhich you downloadedRight-click on
data, then clickExtract to "data\"(Fig. 81)
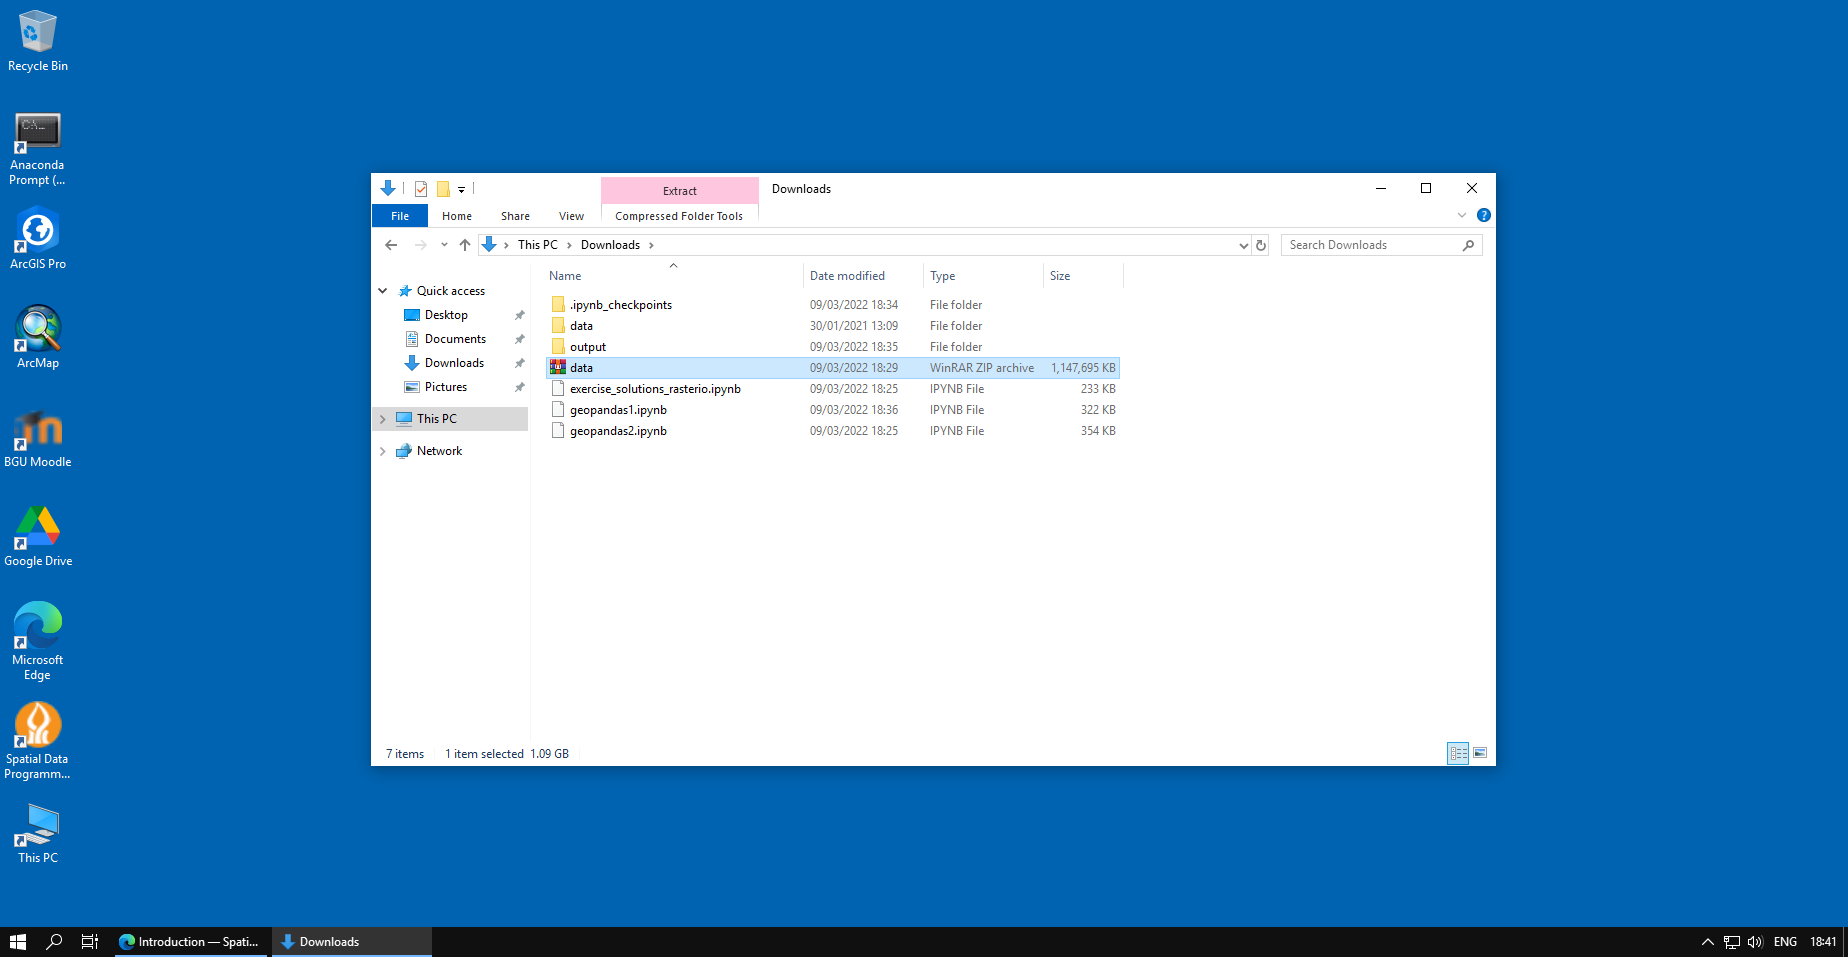
Fig. 81 Extracting to data sub-directory#
Step 3: Create output directory#
Create a directory named
output(for exported files)
Step 4: Download the notebook(s)#
Download any of the notebook files of the course (Fig. 17) you wish to work with
If you intend to work on a new blank notebook, then you will be able to create one from within the Jupyter notebook interface (see next step)
Step 5: Start the Jupyter Notebook interface#
From the desktop, click on “Anaconda Prompt (Miniconda)”
In the command line, type
juputer notebookand press EnterIf asked, choose to open the application with the Edge Browser and click OK
You should now be able to work in the Jupyter Notebook interface, in an environment where all packages we learn about are installed and sample data are accessible in the
datasub-directory (Fig. 82)
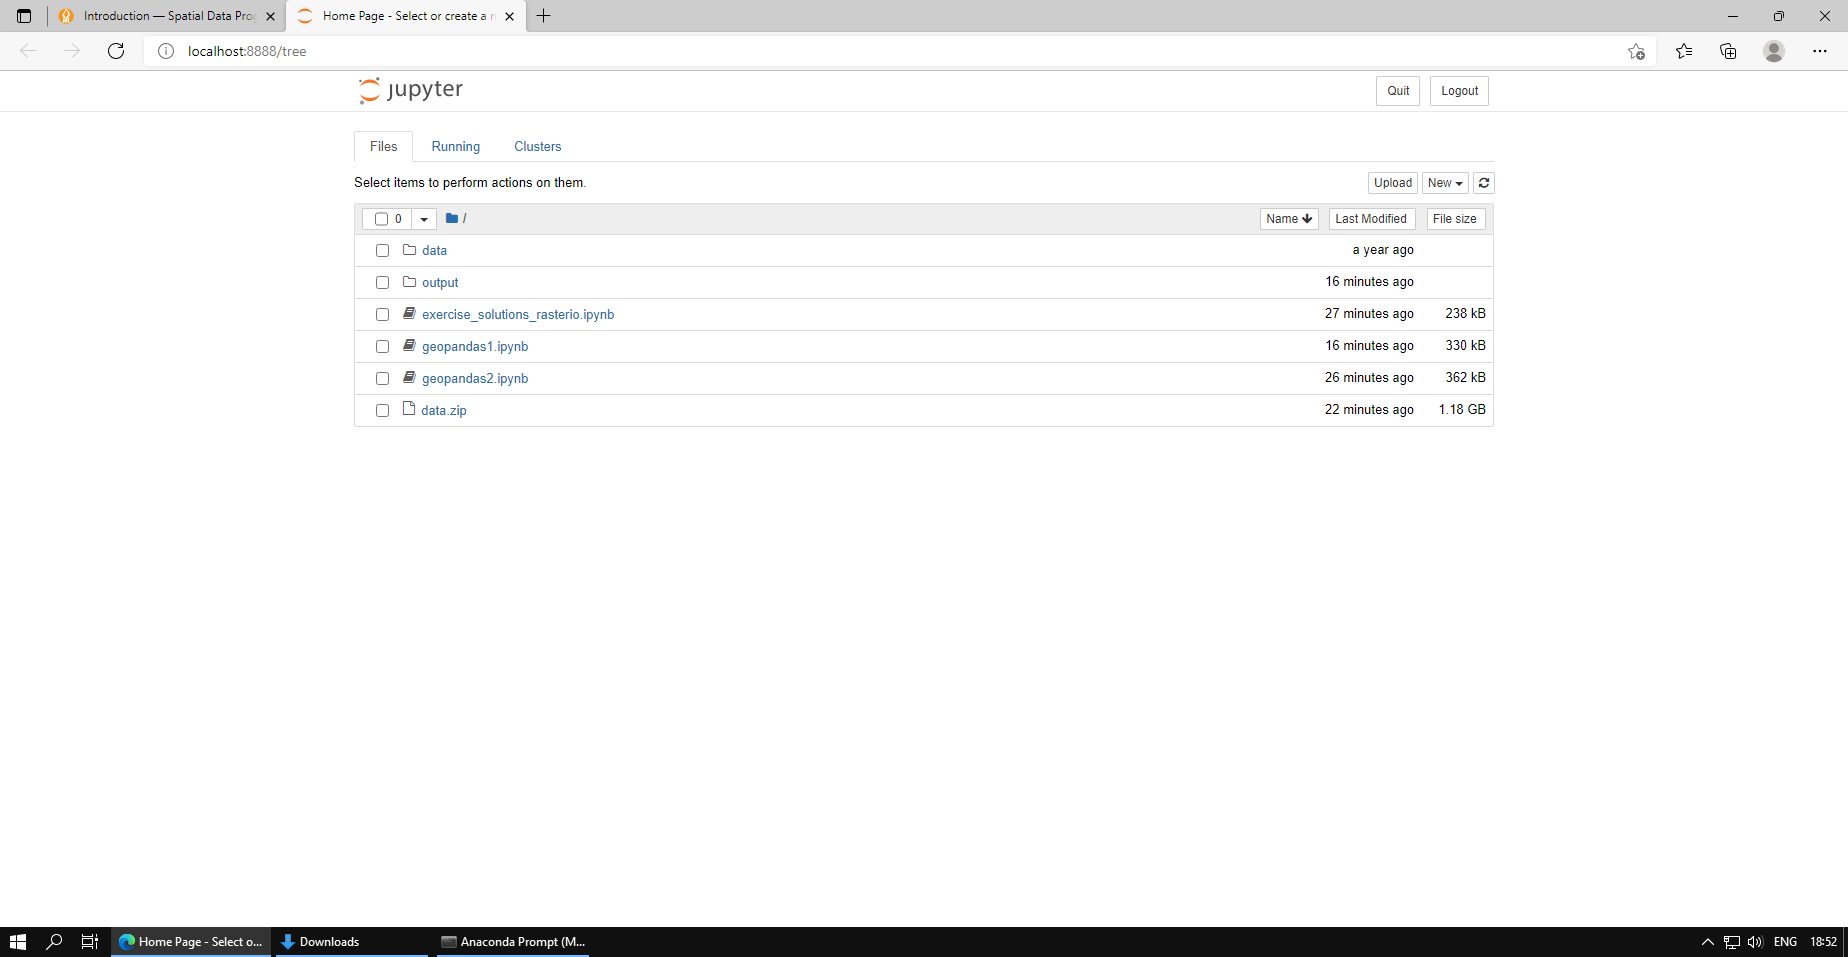
Fig. 82 The Jupyter Notebook interface#
When done, close the browser, terminate the Jupyter Notebook application (by pressing Ctrl+C), then log off from the virtual image (by clicking “Start”→Your user→”Sign Out”) (Fig. 83)
Important!!! When logging off the virtual environment, the contents of “Downloads”, including the files you have been working with, are deleted! Make sure you copy them to a USB device, e-mail to yourself, etc., before shutting down.

Fig. 83 Signing out of the virtual image#